
Discover the joy of making your own envelopes. It’s fun for hobbyists and creative people of all ages. This guide will show you how to make your own envelopes from scratch.
You’ll learn about choosing materials and adding personal touches. This tutorial will help you start your DIY envelope projects. They add a special touch to your letters or crafts.
Major Key Takeaways
- Learn the benefits of making your own envelopes.
- Explore different materials and tools for envelope making at home.
- Discover step-by-step instructions for crafting custom envelopes.
- Understand folding techniques and creative alternatives to adhesives.
- Find inspiration for creative envelope designs for kids.
- Get tips on mailing your DIY envelopes with confidence.
Why Make Your Own Envelopes?
Creating your own envelopes is a fun way to mix practicality with creativity. And It offers many benefits, from saving money to helping the environment. This DIY approach is worth trying.
Cost-Effective and Personal Touch
Making your own envelopes can save you money. You can use scraps of paper or old magazines. This way, you add a special touch to your mail.
This is perfect for birthdays, holidays, or just because. Your loved ones will love the effort you put into making something unique.
Creative Freedom
One big plus of making your own envelopes is the freedom to be creative. You can try out different sizes, shapes, and designs. Each envelope can be a work of art.
You can make them fit any occasion and person. Whether it’s a fancy design or something simple, you have endless options.
Environmentally Friendly
Creating envelopes from recycled materials is good for the planet. It helps reduce waste and makes a smaller environmental impact. This thoughtful action encourages others to choose eco-friendly options too.
Materials You Will Need
Before starting to make envelopes, it’s key to get all the right envelope making supplies and DIY crafting materials. Having everything ready makes the crafting process easier and more fun.
Types of Paper
The paper you pick affects the envelope’s look and strength. You can choose from common office paper to special craft papers. Each one adds a different flair. Here’s a quick guide to help you pick the right one:
| Type of Paper | Characteristics | Best For |
| Standard Office Paper | Lightweight, easy to find | Everyday use, simple designs |
| Cardstock | Thicker, lasts longer | Gifting, special events |
| Kraft Paper | Green, has a rustic feel | Earth-friendly crafts |
| Patterned Paper | Decorative, vibrant | Unique and creative designs |
Basic Tools and Accessories
To make envelopes, you’ll need some essential envelope tools and accessories. Without them, making neat and precise envelopes can be tough. Make sure you have these items ready:
- Scissors – For cutting paper to the right size.
- Ruler – To measure and mark correctly.
- Adhesive – Glue or double-sided tape for sticking the folds.
- Pencil – For drawing measurements and lines.
- Bone folder – To make sharp, clean folds.
Choosing the Right Paper Size
Choosing the right paper size is key for making envelopes that fit your needs. Each paper type has its own benefits. They can change how your final product looks and feels.
A4 Paper
A4 paper is a popular choice for envelopes. It’s 8.27 x 11.69 inches, perfect for regular mail. Using A4 envelope templates makes your envelopes look neat and professional.
A3 Paper
A3 paper is great for bigger envelopes. It’s 11.69 x 16.54 inches, ideal for big documents or thick mail. A3 envelope templates help make sturdy, spacious envelopes.
Chart Paper
For really big envelopes, chart paper is a good pick. It lets you make custom sizes and shapes. It’s great for unique, oversized mail, like event invites or arts and crafts.
Knowing about different envelope sizes helps you make better choices. Whether you use A3 and A4 templates or go for bigger options, the right paper makes a big difference. It affects both how well your envelopes work and how they look.
How to Make an Envelope from A4 Paper
Making your own A4 paper envelopes is fun and creative. Our easy guide will help you create unique envelopes for any occasion. Whether for personal or professional use, these steps will help your envelopes shine.
Step-by-Step Instructions
Here’s how to make your own A4 paper envelopes:
- Place your A4 paper on a flat surface. Choose the color or pattern you like.
- Fold the paper in half lengthwise and then unfold it.
- Fold both shorter ends towards the center crease, leaving a small gap in the middle.
- Bend the bottom up to cover about one-third of the paper. Make sure it’s well-creased.
- And it should fold the top down to overlap the bottom fold. Use glue or a sticker to seal it.
https://www.youtube.com/watch?v=FPH_t9wrYEg
Creativity Tips for A4 Envelopes
Here are some creative ideas for your A4 envelopes:
- Use colored or patterned A4 paper: Pick unique patterns or bright colors to make your envelopes stand out.
- Decorate with stickers and stamps: Add themed stickers or rubber stamp designs to match your letter or occasion.
- Experiment with calligraphy: Use beautiful calligraphy to address your envelopes, making them look elegant and sophisticated.
With these tips, your A4 paper envelopes can be more than just a way to send a letter. They can be creative expressions. Enjoy making your own envelopes and let your imagination run wild with designs and decorations.
How to Make a Big Envelope
Making a large envelope is a fun and useful craft. It’s great for keeping documents flat or for special events. We’ll look at two main ways: using chart paper and A3 paper.
Using Chart Paper
Chart paper is perfect for making strong, big envelopes. Here’s how to do it:
- Measure and Cut: Cut your chart paper to the right size. Make sure it’s big enough for what you want to put inside.
- Fold and Crease: Fold the paper into a rectangular shape. This will be the body of your envelope. Make sure the folds are sharp for a neat look.
- Glue or Tape Edges: Use glue or tape to seal the sides of the envelope. Make sure they stick well.
- Add Finishing Touches: Make your envelope special with decorations, labels, or other creative ideas.
Using A3 Paper
A3 paper is also great for making big envelopes. Here’s how to do it:
- Size Matters: Choose an A3 paper for envelopes that are both big and neat.
- Create Your Shape: Fold the A3 paper in half lengthwise to find the middle. Then, fold the sides in to meet at the middle crease.
- Secure the Form: Use glue or tape to hold the sides together. And it is make sure they line up well.
- Finishing Up: Finish your envelope by folding the last flap down and securing it with glue or tape.
By following these steps, you can make beautiful, useful envelopes with chart paper or A3 paper. Whether you’re doing chart paper projects or A3 envelope construction, your envelopes will look good and be practical.
How Do I Make an Envelope?
Starting to make envelopes can be both fun and rewarding. Knowing the basic envelope folding methods and having the right tools is key. We’ll cover the essential techniques and tips to help you become a pro at perfect envelope creation.
Basic Techniques
The first step to making a perfect envelope is to learn the basics. Choose paper that’s strong but also bends easily. The secret to good envelope folding methods is in the measurements and folds.
And it starts by folding the paper diagonally to make a triangle. Cut off any extra paper to avoid thick seams. Then, fold the side flaps inwards, making sure they line up. Finally, fold the bottom flap up and secure it to complete the envelope.
Tools and Tips for a Perfect Envelope
Having the right tools makes envelope-making easier and better. For a perfect envelope, use a ruler, bone folder, and double-sided tape. The ruler helps make straight edges, the bone folder makes sharp folds, and double-sided tape keeps things tidy.
Adding a personal touch with washi tape or stickers is also a great idea. This makes your envelopes unique and special. By using these envelope folding methods and tools, you’ll create beautiful envelopes for any occasion. Whether it’s for a big event or just to add a personal touch, you’ll make envelopes that are always perfect.
How to Make an Envelope Without Glue
Making envelopes without glue is creative and innovative. This section will show you how to fold envelopes without glue. You’ll also learn about unique ways to seal them, making your envelopes stand out.
Folding Techniques
Learning to fold envelopes without glue is rewarding. These methods make your envelopes secure and stylish. Start with a square piece of paper and fold the edges towards the center.
Make sure each corner overlaps neatly. This technique gives your envelopes a neat, secure finish. And it shows off your creative skills.
Creative Alternatives to Adhesives
For alternatives you want to try something different! There are many ways to seal envelopes without glue. Use ribbons, stickers, or wax seals to keep them closed.
Ribbons add a charming touch and serve as a functional closure. Wax seals give your envelopes a classic, sophisticated look. They make your envelopes truly unique.
Exploring these creative envelope designs will inspire you. By using glue-free and adhesive-free methods, you make a statement. You also help the environment by choosing sustainable crafting options.
Creative Envelope Designs for Kids
Getting kids to decorate envelopes is a great way to boost their creativity and art skills. Giving them lots of fun patterns and bright colors makes the task exciting.
Fun Patterns
For kids’ craft envelopes, using different fun patterns is important. They can draw and color simple shapes like stars, hearts, and zigzags. Encourage them to mix these shapes with bright colors to make their envelopes pop.
Coloring Ideas
Coloring is a big part of envelope decorating for kids. Let them use markers, crayons, or colored pencils to bring their designs to life. They can try themes like rainbow stripes, polka dots, or nature patterns like leaves and flowers.
These activities help kids improve their fine motor skills while having fun. Whether it’s for a special event or just for fun, these ideas make envelope decorating a joy for kids.
How Do I Make an Envelope Easy?
The easiest way to make an envelope requires nothing more than a rectangular piece of paper and a bit of glue. Here’s a beginner-friendly method that even kids can enjoy:
Materials Needed:
- One sheet of rectangular paper (A4, letter size, or similar)
- Glue stick or double-sided tape
- Scissors (optional)
- Ruler and pencil (optional for clean folds)
Following key Steps:
- Position the Paper: Lay your rectangle paper vertically (portrait orientation).
- Fold the Bottom: Fold the bottom third of the paper upward. This creates the body of the envelope.
- Create Side Flaps: Fold in both left and right edges by about 1 inch. These will be the side flaps to seal the envelope.
- For Top Flap: Fold down the remaining top section — either as a straight flap or trim into a triangle for creative traditional look.
- Seal: Apply glue on the side flaps and press the bottom fold over them. Leave the top flap unsealed so you can insert your letter or card.
This is a fast, no-fuss way to create envelopes for party invitations, thank-you notes, or even just organizing papers at home. So next time you’re asking yourself, how do I make an envelope easy? — this is your go-to method.
How to Make an Envelope with Rectangle Paper
Many of us have rectangular paper lying around — from old notebooks, printers, or even leftover wrapping paper. You can turn any of these into an envelope without special measurements or patterns.
Creative Tip:
Use decorative papers like scrapbook sheets or old calendar pages for a unique finish.
Basic Fold Technique:
- Firstly start with a horizontal rectangle.
- Fold in both long edges about half an inch.
- Fold the bottom third upward and glue the edges over the folded sides.
- And fold the top flap down to complete the envelope.
- Use stickers, seals, or washi tape to close it securely.
Whether you’re crafting with kids or just looking for a practical solution, knowing how to make an envelope with rectangle paper opens the door to endless customization opportunities.
How to Make Big Envelope with Chart Paper
Sometimes a standard envelope just isn’t big enough. If you’re mailing oversized cards, certificates, art prints, or school projects, learning how to make big envelope with chart paper can be incredibly useful.
What You’ll Need:
- 1 sheet of chart paper (preferably A2 or larger)
- Glue or tape
- Ruler, pencil, and scissors
Key Steps:
- Define Measure Your Item: Add at least 1–2 inches of space on all sides.
- Cut and Fold: Cut a large rectangle, then fold the bottom section upward to cover about two-thirds of the paper height.
- Fold Side Flaps: Fold both sides inward by 1 inch and glue them to secure the bottom fold.
- For Top Flap: Fold the top down to cover the open pocket.
- Decorate (Optional): Add labels, stamps, or stickers for a professional or fun look.
These big envelopes are great for storing documents or gifting oversized items. They’re sturdy, economical, and can even be reused.
How to Make Envelope by Hand – Get Creative
In today’s digital-first world, a handwritten letter or handmade card carries rare emotional weight. But what truly completes it is a custom, handmade envelope — thoughtful, creative, and entirely one-of-a-kind. Whether you’re a student, parent, craft enthusiast, or just someone looking to add a personal touch, this guide will show you how to make an envelope by hand, using simple materials and a few folds.
If you’re wondering, how do I make an envelope easy without any special tools or templates, you’re in the right place. Let’s dive into a few practical, fun, and creative methods suitable for all ages.
The best part of learning how to make envelopes by hand is the freedom to customize. From recycled materials to fine paper, your envelope can reflect your personality, mood, or message.
Fun Ideas:
- Craft with Kids: Use colored construction paper and let kids decorate with stickers or drawings.
- Eco-Friendly Options: Reuse old maps, newspaper pages, or magazine covers.
- Elegant Touch: Try kraft paper with wax seals for a vintage vibe.
No two handmade envelopes are alike, and that’s the beauty. It adds a special, thoughtful touch to your message, whether it’s for a birthday card or a heartfelt letter.
How to Make a Small Envelope
Making a tiny envelope is a fun and easy craft. It’s great for sending special notes or small gifts. And follow this simple guide to make your own.
Simple Folding Guide
You’ll need a square piece of paper, a ruler, and a bone folder for this project. Place your paper flat with the pretty side down. And you should fold it in half diagonally to make a triangle.
Unfold it, then fold each corner to the center. The corners should meet at the diagonal creases. Finally, fold the bottom edge up to close the envelope.
Perfect for Small Notes and Cards
These tiny envelopes are perfect for small messages or as a unique gift card holder. Their small size makes any message feel extra special.
| For Major Purpose | Benefits |
| Tiny Note Envelopes | Perfect for small, heartfelt messages |
| Gift Card Envelope Craft | Adds a personal, creative flair to gift-giving |
How to Trifold Paper for an Envelope
Making a trifold envelope is easy and looks great. It’s perfect for sending letters and more. And it’s both stylish and useful.
Precise Folding Method
Folding paper right is crucial for a good trifold envelope. Here’s how to do it:
- Begin with a flat, clean piece of paper. An A4 sheet works well for letters.
- And imagine the paper divided into three parts. Use a ruler to mark the folds if you need to.
- Fold the bottom third up to the middle, making a sharp crease.
- Then, fold the top third down to meet the bottom, sealing your letter.
Applications of Trifold Envelopes
Trifold envelopes are great for many uses. They mix usefulness with style. Here are some ways to use them:
- Business Correspondence: They keep your documents tidy, perfect for work letters.
- Invitations: For fancy events like weddings, trifolding adds elegance.
- Personal Letters: A trifold envelope makes your personal messages special.
Can You Make Your Own Envelope to Mail?
Making your own envelopes to mail can add a special touch to your letters. If you plan to send them via the United States Postal Service, knowing the USPS mailing standards is key. This way, your homemade envelopes will reach their destination safely.
U.S. Postal Service Guidelines
The USPS has rules for mailing homemade envelopes. Your envelope must be between 3.5 x 5 inches and 6.125 x 11.5 inches. It should also be rectangular, even in thickness, and not have anything sticking out.
Make sure to put the right amount of postage on it. You can check the weight of your envelope to figure out how much postage you need. Following these USPS guidelines will help your DIY envelope get through the mail system without trouble.
Tips for Mailing DIY Envelopes
Here are some tips for mailing your DIY envelopes:
- Choose sturdy paper: Pick a strong paper to handle the mail journey.
- Ensure legibility: Write the address clearly in dark ink and double-check it.
- Securely seal: Use a strong adhesive to seal the envelope to prevent it from opening during transit.
- Include a return address: Adding a return address helps if the envelope can’t be delivered.
- Proper postage: Remember to weigh your envelope and put the correct postage on it.
By following these tips and guidelines, you can mail your homemade envelopes with confidence. They will meet USPS standards and add a personal touch to your mail.
How to Make an Envelope in 2 Minutes?
If you’re in a rush and need an envelope fast, we’ve got you covered. This fast envelope creation guide makes a ready envelope in under two minutes. Just follow these easy steps and you’ll learn to fold envelopes quickly.
Quick and Easy Guide
- Gather Your Materials: Start with a rectangular piece of paper, like an A4 or letter-sized sheet.
- Fold the Paper: Place the paper vertically and fold it in half horizontally.
- Fold the Edges: Fold the left and right edges towards the center crease, overlapping them slightly.
- Create the Flap: Fold the top edge down to form the envelope flap.
- Secure the Edges: Tuck the side flaps inside the bottom fold and secure with a bit of tape or adhesive.
This 2-minute envelope guide makes a functional and neat envelope quickly, perfect for urgent needs.
Best Practices for Speed
- Use pre-cut paper: Ensure your paper is already cut to the preferred size for fast envelope creation.
- Practice makes perfect: The more you practice, the faster you’ll become at speedy envelope folding.
- Stay organized: Keep your materials in one place to save time searching during an urgent task.
| Key Step | Time (Seconds) | Major Tips |
| Gather Materials | 10 | Keep paper pre-cut |
| Fold Paper | 15 | Align edges perfectly |
| Fold Edges | 20 | Overlap sides slightly |
| Create Flap | 10 | Fold precisely |
| Secure Edges | 15 | Use tape efficiently |
By following these steps and best practices, you can make envelopes quickly and effectively every time.
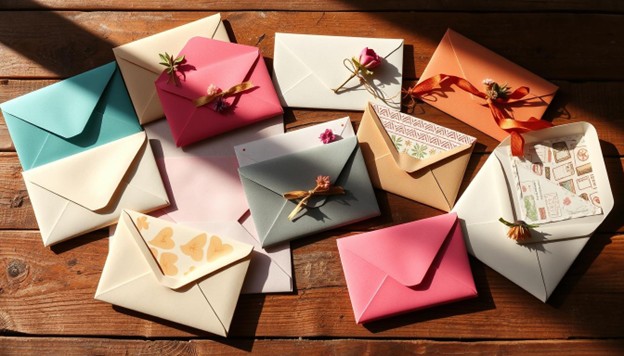
Customizing Your Envelopes
Customizing your envelopes can turn them into something special. Here, we share creative ways to make your envelopes stand out. These ideas will leave a lasting impression on anyone who receives them.
Adding Personal Touches
Adding a monogram or initials is a simple yet meaningful touch. Hand-drawn designs offer a personal feel that mass production can’t match. Use calligraphy pens or metallic markers for a touch of elegance.
Hand-drawn art or doodles are also great for showing off your creativity. These touches make every letter you send feel special.
Using Decorative Elements
Decorative elements like stamps, stickers, and washi tape can also enhance your envelopes. Stickers and stamps can show a theme or season, while washi tape adds a charming finish. Layering these elements can turn a plain envelope into a work of art.
Choose colors and patterns that match to create a cohesive look. This way, each envelope tells its own story.
These ideas for decorative enhancements and personal touches will surely impress your recipients. Your customized envelopes will be both beautiful and memorable.
FInal Thoughts
In this guide, we’ve explored the joy of making custom envelopes by hand. We’ve covered everything from the benefits of making your own to choosing the right materials and tools. Now, you know how to create beautiful, personalized envelopes for any occasion.
We’ve shown you how to make envelopes from different paper sizes like A4 and A3. You’ve learned step-by-step how to add your own touch to them. The DIY review helped you see how to make envelopes without glue, making it fun for everyone, even kids.
Envelope making is more than a craft; it’s a fun experience that brings joy. By using these tips, you can turn simple paper into something special. Whether it’s a letter, a card, or a message for a friend, you’ll feel proud of your work. We hope these final thoughts inspire you to keep making envelopes and enjoying the process.
Look into FAQs
How do I make an envelope with paper?
While making an envelope is easy, start with a rectangular paper. Fold the sides towards the center. Then, create the top and bottom flaps. It is secure with glue or adhesive.
How do you fold paper for an envelope?
To fold paper for an envelope, place it in landscape orientation. Fold the bottom up to form the body. It is folded on the sides towards the center. And now finally, fold the top flap down. It is secured with adhesive if needed.
How do I make an envelope step by step?
Before starting with a rectangular paper, fold the sides into the center to meet. This is to fold the bottom up to create the pocket. Fold the top down to create a flap. Secure with glue or adhesive tape.
Question for How to properly format an envelope for mailing?
To format an envelope for mailing, write the recipient’s address in the center. Put your return address in the top left corner. And place the stamp in the top right corner. It is to use clear and legible handwriting.
And how to make an envelope in 2 minutes?
Quickly fold the paper into thirds. Fold one end to form the bottom flap. Tuck the other end to form the top flap. It is secure with a sticker or tape. It be done in just 2 minutes.
Can you make your own envelope to mail?
Yes, you can make your own envelope for mailing. It must meet U.S. Postal Service guidelines. Ensure it’s sturdy, properly sealed, and has the correct postage.
How to make a paper envelope small step by step?
For a small paper envelope, start with a square or small rectangular paper. Fold the corners inward. Then, fold the bottom and top flaps to the center. Secure with stickers or tape for a neat finish.
What size paper do you need to make envelopes?
The paper size needed depends on the envelope size you want. Commonly, A4 and A3 papers are used. But you can also use smaller or larger sheets based on your needs.
How to trifold paper for an envelope?
To trifold paper for an envelope, fold the bottom third up. Next, fold the top third down over it. This method is often used for letters to fit neatly into a standard business envelope.
Leave a Reply