

Microsoft Word can print envelopes without extra software. It’s faster than handwriting a stack of mail. If you’ve searched how to print an envelope in word , this guide is for you.
This tutorial covers the basics of envelope printing. It also includes the details for real printers. You’ll learn how to print one envelope, adjust the layout, and save a setup for later use.
It also sets clear expectations. Word has a built-in Envelopes tool. But, results depend on your printer’s settings and the envelope size and orientation. Once you get the settings right, printing envelopes becomes easy, whether it’s one piece or a batch.
Key Takeaways
- Use Word’s built-in Envelopes tool to print a single envelope quickly.
- Choose the correct envelope size (especially #10) to avoid cut-off text.
- Match your printer’s feed direction and tray settings for clean alignment.
- Customize fonts and spacing so addresses look clear and professional.
- Save settings to speed up future envelope printing jobs.
- Learn simple checks that prevent common jams, smudges, and misprints.
Envelope Printing in Microsoft Word: What You’ll Learn
Printing envelopes in Microsoft Word can seem tricky at first. But, it’s easy once you know where to find the tools and what to check before printing. This guide will show you how to set everything up right, so your envelopes are printed correctly.
You’ll learn where the Envelopes feature is in desktop Word and how it connects to your printer. If you’ve wondered how to print envelopes in Word Perfect, you’ll get a step-by-step guide. This will make the process feel straightforward.
Next, you’ll discover how to type in addresses and preview them before printing. It’s important to get the envelope size and feed direction right to avoid printing errors. We’ll explain how to set up your printer and envelope correctly.
Custom envelope printing is key for business mail. You’ll learn how to change fonts, spacing, and address positions. Plus, how to print just the envelope without extra pages.
Finally, you’ll see how to print many envelopes at once using Mail Merge. This includes lists from Microsoft Excel. If you use Word for the web, you’ll find out what it can and can’t do for envelope printing. These steps aim for clean formatting, accurate alignment, and consistent results.
| What you’ll learn | Why it matters for envelope printing | Common mistake it helps prevent |
| Find the Envelopes feature in desktop Microsoft Word | Gets you to the correct tool for address layout and print setup | Typing addresses into a blank page and printing with wrong margins |
| Enter delivery and return addresses and preview placement | Lets you confirm spacing before ink touches paper | Text printing too high, too low, or too close to the edge |
| Choose envelope size, orientation, and printer feed | Aligns Word’s layout with how your printer pulls the envelope | Upside-down printing or shifted addresses from tray mismatch |
| Use custom envelope printing (fonts, spacing, offsets) | Keeps branding readable and improves deliverability | Small fonts, cramped lines, or address blocks drifting off-center |
| Print only the envelope output | Stops unwanted pages and saves time in the print queue | Blank pages printing after the envelope |
| Mail Merge with Excel lists for batches | Makes high-volume mail consistent and faster to run | Copy-paste errors, wrong ZIP formats, or skipped recipients |
| Work around Word Online limits | Keeps you moving when the web app can’t run full envelope tools | Assuming Word Online supports the same envelope printing controls |
What You Need Before You Start Envelope Printing
Before you hit Print, make sure everything is set up right. A few quick checks can prevent crooked text, smudges, or addresses too close to the edge. If you’re printing custom envelopes with a logo or specific font, setting up the basics is crucial.
Supported Word versions and Windows vs. Mac notes
For the best envelope printing, use the Microsoft Word desktop app on Windows or macOS. The desktop versions offer more control over feed options, layout, and print settings than Word for the web.
Menus might look different between Windows and Mac, but the Envelopes feature is still there in modern builds. When custom printing envelopes, use the desktop app to ensure spacing and positioning are consistent.
Envelope sizes you should know (A2, A7, #10, etc.)
Choosing the right size in Word is important. If the size doesn’t match the real envelope, addresses can shift, clip, or print too high.
| Envelope size | Common U.S. use | What to watch for in Word |
| #10 | Business mail, invoices, statements | Most printers support it, but confirm the correct feed direction to prevent skew |
| A7 | Invitations, greeting cards, announcements | Smaller canvas makes margins feel tighter; preview placement to avoid edge cuts |
| A2 | RSVP cards, small notes, thank-you cards | Text can crowd the flap area; adjust return address position if needed |
Even if your envelope looks “close enough,” choose the exact match in the envelope settings. This one step keeps envelope printing clean and predictable.
Printer requirements and paper tray considerations
Not every printer handles envelopes well. Many models need a manual feed slot or a specific tray setting to prevent jams. For custom envelope printing on thicker stock, this matters even more.
Envelope seams and thickness can affect how the paper grabs and how ink dries. Check your printer’s supported media types, then load a few envelopes the recommended way and run a test print. This simple habit can stabilize envelope printing and cut down on smears.
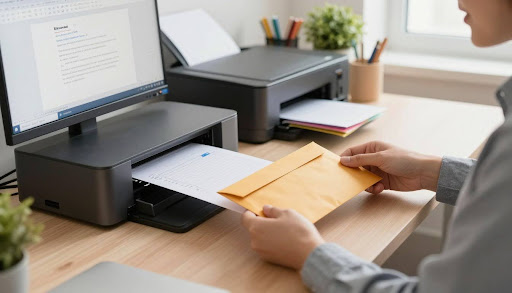
How to Print an Envelope in Word
Wondering how to print an envelope in Word? Good news: Word has a built-in tool for layout, spacing, and print setup. It saves you from trial-and-error runs that waste envelopes. The same steps work for printing envelopes for free using Word’s standard features.
Where to find the Envelopes tool in Word
Open Microsoft Word and go to the Mailings tab on the ribbon. Look for Envelopes in the Create group, then select it to open the envelope window. This is the fastest way to print an envelope in Word without starting from scratch.
Once the window opens, Word shows a preview with address blocks and a printing path tied to your current printer. If you’re looking for free options, this built-in workflow is a good starting point. It doesn’t require add-ons.
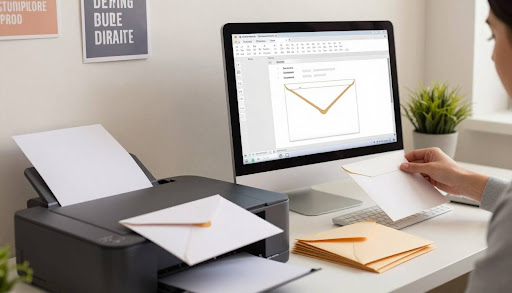
Entering delivery and return addresses correctly
Type the delivery address exactly as it should appear on the mailpiece, using clean line breaks. Keep capitalization consistent, and skip extra commas or stray spaces that can shift text placement. For apartments or suites, place the unit on the same line as the street address or on the line directly below it.
For the return address, keep it compact so it fits smaller envelopes without crowding the margins. If you’re practicing how to print an envelope in Word, consistent formatting makes the preview more reliable and reduces alignment surprises.
Previewing layout and avoiding common alignment issues
Before you print, use the preview to confirm both address blocks sit inside the printable area. If the delivery address looks too high or too far right, double-check the selected envelope size and orientation in the Options area.
Common alignment problems often come from printer settings, not Word. Watch for driver defaults like scaling, and avoid settings such as Fit to page that can move addresses. When troubleshooting how to print an envelope in word free, turn off scaling first, then re-check feed direction in your printer’s preferences.
| Issue you see | Likely cause | Quick fix inside Word/printer settings |
| Text prints too high or too low | Wrong envelope size selected or printer feed orientation mismatch | Confirm envelope size in Options; verify feed direction and tray in printer preferences |
| Return address drifts toward the edge | Margins too tight for the envelope or font size too large | Reduce font size; adjust return address position in Options |
| Everything shifts slightly left/right | Scaling enabled or driver overrides Word placement | Disable scaling; set print size to 100% and recheck alignment in preview |
| Preview looks fine, print is off | Manual feed guides not snug or envelope not seated flat | Align envelope against guides; feed one at a time and keep stack pressure light |
Printing a single envelope vs. adding to a document
To print one envelope right away, enter both addresses and choose Print from the envelope window. This is the simplest approach when you need how to print an envelope in Word for a one-off mailing.
If you select Add to Document, Word inserts the envelope as a page so you can reuse the layout, tweak spacing, or save it with a letter. This option is handy when you want repeatable settings and still keep the process how to print an envelope in word free using tools already included with Word.
Choosing the Right Envelope Size and Orientation
Good envelope printing starts with matching the size in Microsoft Word to the envelope in your hand. If they don’t match, addresses can get messy. Before printing a lot, make sure the envelope size and printer feed path are correct.
In the U.S., #10 envelopes are common for business mail. A7 and A2 envelopes are used for social mail like invitations. These sizes work well with clean fonts and wide spacing for custom printing.
| Envelope size | Common U.S. use | Typical Word selection to verify | Orientation and feed note |
| #10 (4.125″ × 9.5″) | Business letters, bills, checks | Choose “#10 Envelope” in Word | Often prints landscape-style; confirm which edge leads into the tray |
| A7 (5.25″ × 7.25″) | Invitations, greeting cards | Select the matching A7 option or enter custom dimensions | Many printers rotate the image; test one envelope to confirm direction |
| A2 (4.375″ × 5.75″) | RSVPs, thank-you cards, small notes | Pick A2 if listed, or set a custom size | Thicker stock may need manual feed to avoid skew |
Orientation is as important as size because printers handle envelopes differently. Some rotate the print automatically, while others need it inserted a certain way. If unsure, check the tray diagram and test with the flap position you plan to use.
To avoid wasting envelopes, check three things before printing: Word’s selected envelope size, your printer’s Preferences, and the driver’s orientation. This quick check ensures consistent printing, especially when switching between regular mail and custom envelopes.
Setting Up Custom Envelope Printing (Fonts, Spacing, and Placement)
Good custom envelope printing starts with small choices. These choices include clean type, steady spacing, and address blocks in the right place. If you’re learning how to make envelope printing in word, this is where your envelopes start to look the same.
Changing font style, size, and formatting for addresses
In Word’s Envelopes settings, you can format the delivery and return addresses separately. This helps keep the delivery line easy to read while using a smaller size for the return block.
For most envelope stock, use fonts that print crisp edges. Arial, Calibri, and Times New Roman work well on textured paper. Aim for 10–12 pt on the delivery address and 8–10 pt on the return address, with regular weight and normal spacing.
Adjusting the delivery and return address positions
Printers don’t always feed envelopes the same way. In custom envelope printing, small adjustments can fix issues like addresses drifting left or looking skewed.
Printers don’t always feed envelopes the same way. In custom envelope printing, small adjustments can fix issues like addresses drifting left or looking skewed.
Use the positioning options to move each block up, down, left, or right in small steps. Find a setting that works and keep it the same for the same envelope size, tray, and feed direction. This consistency is key to professional output when practicing how to make envelope printing in word.
Using USPS-friendly formatting for better deliverability
USPS sorting equipment reads best with simple and predictable addresses. Use clear lines, avoid decorative scripts, and keep spacing even. This makes the city, state, and ZIP code stand out.
When possible, use a full ZIP or ZIP+4 and keep punctuation light. Add attention lines or suite numbers on their own line to reduce confusion. This kind of formatting supports custom envelope printing workflows where the same layout repeats across many mail pieces.
| Element | Recommended setup | Why it helps on real envelopes |
| Delivery address font | Arial or Calibri, 10–12 pt, regular weight | Stays readable and scans cleanly; reduces smudged-looking edges on inkjet prints |
| Return address font | Calibri or Times New Roman, 8–10 pt, regular weight | Keeps the corner block neat without competing with the delivery address |
| Line spacing | Single spacing with consistent breaks between lines | Creates a stable text block that’s easier to read and less likely to blur together |
| Address placement tweaks | Adjust in small steps (about 0.05–0.10 inches at a time) | Corrects common feed tolerance issues, especially when printing multiple envelopes |
| USPS-friendly delivery lines | Street on one line, unit on its own line, CITY ST ZIP on the last line | Improves clarity for automated sorting and reduces misreads on tight layouts |
Using an Envelope Printing Template Word Users Can Reuse
When your spacing is dialed in, save it. A reusable envelope setup keeps addresses crisp and centered. With an envelope printing template word file, you can lock in the same margins, font choices, and delivery address placement each time.
Saving your envelope as a template for future use
Start by creating one envelope that prints correctly on your printer. Make sure the return address and delivery address sit where you want them, then keep those settings as your baseline.
Save the document as a template so Word won’t overwrite your original layout. This keeps your spacing, formatting, and position tweaks intact, which is the real value of an envelope printing template word you can trust.
Finding and editing a free envelope printing template word file
Word’s template search and built-in options can surface envelope layouts fast, including a free envelope printing template word design you can adjust in minutes. After you open one, replace the sample text with your preferred address style and confirm the font is readable at arm’s length.
Before printing, confirm the template size matches your real envelope. Many files default to a common size like #10, so a quick size check prevents clipped text and off-center placement. A free envelope printing template word is only “free” if it saves you waste, too.
| Template check | What to confirm in Word | Why it matters on paper |
| Envelope size | Matches #10, A7, A2, or your custom dimensions | Prevents trimming, cutoff ZIP codes, and misreads |
| Address position | Delivery block is centered and clear of edges | Avoids skew, jams, and barcode interference |
| Font and spacing | Simple font with consistent line spacing | Improves legibility and reduces smudged-looking text |
| Printer feed notes | Correct tray and face-up/face-down direction | Stops upside-down prints and wasted envelopes |
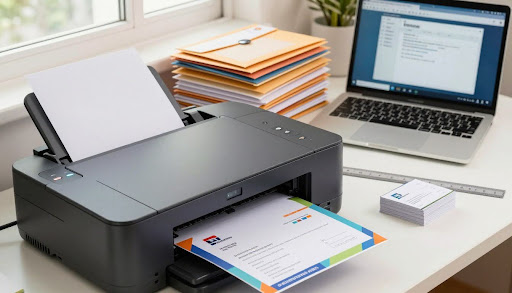
Creating branded templates with logos and return address blocks
If you mail often, brand consistency pays off. Add a logo near the return address and use the same typography you use on letterhead, then save it as an envelope printing template word for everyday use.
Keep artwork away from seams and the envelope’s edge, where rollers grip and glue lines sit. Use lighter ink coverage near borders, and run a quick test print to check for smudge resistance before you commit to a full stack.
How to Print on an Envelope with HP Printer Settings
HP printers print envelopes well when their settings match what you pick in Word. If you’re using an HP OfficeJet or LaserJet, start by setting the envelope size in Word. Then, make sure the HP Print Preferences match that size. A size mismatch can cause crooked text, misfeeds, and smudges.
Before printing, open your HP printer settings. Check Paper Size and Paper Type/Media. Choose “Envelope” to slow down the printer and adjust ink or heat. This helps avoid toner rub-off or wet ink at the edges.
Choosing the right feed is key. Many HP printers work best with the manual feed slot or a priority tray. Others can use the main tray if the guides fit snugly. Line up the envelope with guide marks, keep the stack small, and avoid bent flaps to prevent jams.
| HP setting to check | What to select | What it helps prevent |
| Paper Size | Match Word (for example, #10 or A7) | Side-to-side shift, clipped return address, off-center delivery address |
| Paper Type/Media | Envelope or Heavyweight (closest available option) | Smearing, poor fusing on laser models, slow-drying ink on inkjets |
| Source/Tray | Manual feed or the recommended tray for envelopes | Misfeeds, flap catching, multiple envelopes pulling at once |
| Print Quality | Normal (use Best only if needed) | Oversaturation, longer dry time, smudges from handling |
For the best results, print a test envelope first. Let it dry before touching the address area. Once it looks right and the ink or toner is set, print a small batch. This steady process helps you master HP printer settings for envelopes.
If your prints still drift, check the tray guides and the HP driver preview. Small changes in feed direction can make a big difference, even if Word’s layout stays the same.
How to Print Envelope in Printer Correctly (Feed Direction and Trays)
Starting with the right feed path is key to clean envelope printing. Issues like twisting, smearing, or jamming often stem from the tray choice or print head orientation. Once you master the correct printer settings, your prints will improve significantly.
Front-load vs. rear-feed printers: what changes
Rear-feed printers offer a straighter path for media. This is great for thicker envelopes, reducing curl and wrinkles. Front-load trays work too, but they need precise orientation and a smaller stack.
Check your printer’s tray icons for orientation clues. They indicate face up or down and flap left or right. For envelope printing, align the icon with your print dialog to avoid mirrored addresses.
Which tray to use and when to use manual feed
Use Tray 1 or a dedicated envelope slot for best results. These paths keep envelopes flat and reduce skew. Make sure to align envelope guides correctly without bending them.
Manual feed is ideal for small batches or thick stock. It’s also useful for testing alignment without wasting envelopes. This method is practical when you’re still learning the ropes.
| Situation | Best feeding choice | Why it helps |
| 1–5 envelopes for a quick test | Manual feed or multipurpose tray | More control, easier to stop if text shifts |
| Thicker, padded, or textured envelopes | Rear feed if available | Straighter paper path can reduce curling and jams |
| Standard #10 envelopes in a small batch | Tray 1 with envelope guides | Stable pickup with consistent alignment |
| Frequent smears or scuffs | Manual feed with one envelope at a time | Less rubbing during pickup and exit |
Paper type, thickness, and print quality settings
In your printer settings, choose Envelope when it’s listed. If not, pick a heavier paper type. This slows print speed but improves ink or toner grip, crucial for envelope printing.
Higher quality can reduce banding but may increase smudge risk. Test a single envelope first. If it smears, adjust ink density, paper type, or drying time before stacking.
How Do I Print Just Envelopes in Word Without Extra Pages?
If you’re wondering how to print just envelopes in Word, start by treating the envelope as its own job. This way, Word won’t pull in extra pages or formatting.
Printing only the envelope output from the Envelopes window
The cleanest method is to print directly from Word’s Envelopes dialog. Enter the addresses, confirm the size, and then print from there. This avoids adding the envelope to a document.
This method reduces surprises in print preview. It ensures you get one envelope layout, not a multi-page file. It’s also helpful for testing alignment and feed direction.
Preventing Word from adding unwanted blank pages
Blank pages often appear when the envelope is inserted into a document with page breaks. Another cause is printing All Pages by habit, which includes the whole document.
Before printing, check the page count in print preview. If there’s more than one page, set a specific page range for the envelope. Make sure the paper size matches the envelope size to avoid layout changes.
Confirming “Print Selection” vs. “Print Current Page” options
Print settings are crucial. Print Current Page is safer for a single-page envelope. Print Selection works if you highlight only the envelope content, but it may adjust margins and spacing.
If you’re stuck wondering why your envelopes won’t print in Word, check three things. Ensure the correct printer is selected, scaling is at 100%, and the paper/envelope size matches the printer’s expectations. A mismatch can cause clipped text, shifted addresses, or an extra blank page.
| Goal | Best Word choice | Where to check | Common pitfall |
| Print one envelope with no extra pages | Print from the Envelopes dialog | Mailings > Envelopes, then Print | Choosing “Add to Document” and later printing All Pages |
| Envelope is already inside a document | Print Current Page | File > Print, then Settings | Printing the entire file, including letter pages and blanks |
| Avoid layout shifts that create blank pages | Keep scaling at 100% and match envelope size | Printer Properties and Word’s Paper Size | “Fit to page” shrinking content and moving text to another page |
| Reduce “nothing prints” errors | Confirm printer, tray, and manual feed option | Printer Properties > Paper Source | Printing to the wrong tray or a paused print queue |
When the workflow is simple and the print range is tight, printing envelopes in Word becomes easy. And if you’re still wondering why your envelopes won’t print, the answer is often in print preview and the page range settings.
How to Print Multiple Address on Envelope in Word Using Mail Merge
Mail Merge is a tool in Word for printing envelopes with different addresses. It’s great for avoiding errors by keeping everything in one place. If you’re wondering how to print multiple addresses on envelopes in Word, this is the way to go.
First, set up the envelope size and layout. Then, connect your list of recipients. Word can use addresses from Outlook, Excel, or a typed list. Next, add the Address Block or specific fields, check the preview, and print.
- Choose an envelope format and confirm delivery and return address placement.
- Select recipients and clean up the list before you print.
- Insert merge fields for name, street, city, state, and ZIP.
- Preview several records, then complete the merge to print envelopes.
Quality checks are important. Small mistakes can be big problems on paper. Check 5–10 records for errors like missing state abbreviations or extra commas. These checks save time and paper.
If you’re also wondering how to print envelopes in Word Perfect, the process is similar. Use its merge or label features and check the address fields before printing. Always print a test set first to ensure everything looks right.
| Mail Merge Step | What to Look For | Quick Fix in Word |
| Envelope setup | Wrong size or rotated layout | Pick the correct envelope size and confirm orientation in print settings |
| Recipient list | Missing columns or mixed formatting | Standardize columns (Street, City, State, ZIP) and remove blank rows |
| Merge fields | Fields in the wrong order or on the wrong line | Reinsert fields and add line breaks where the address should wrap |
| Preview results | Extra commas, double spaces, or missing state abbreviations | Edit the data source or adjust the Address Block format |
| Test print | Skewed text or inconsistent feed | Print 3–5 envelopes first, then adjust tray choice and guides |
How to Print Envelopes in Word from Excel (Mail Merge Workflow)
Mail Merge is a quick way to print envelopes without retyping. To print envelopes in Word from Excel, follow these steps: clean your data in Excel, link it in Word, and then print with the right settings.
Preparing your Excel address list (columns, headers, ZIP formatting)
Begin with one header row and one person per row. Each address part should be in its own column. This makes it easier for Word to place merge fields correctly.
- Use clear headers like FirstName, LastName, Company, Address1, Address2, City, State, ZIP.
- Remove blank rows, extra spaces, and mixed punctuation that can break a merge.
- Format ZIP as text to protect leading zeros, which is common in places like New Jersey and Massachusetts.
| Excel column header | What to enter | Formatting tip | Why it matters in Word |
| FirstName | Recipient first name | Text; avoid trailing spaces | Keeps the greeting line clean if you reuse the list later |
| LastName | Recipient last name | Text; consistent capitalization | Prevents odd-looking output on formal mail |
| Company | Business or organization name | Leave truly blank if not used | Helps Word avoid inserting empty lines in the address block |
| Address1 | Street address or P.O. Box | Text; keep abbreviations consistent | Reduces layout shifts across envelopes |
| Address2 | Apt, Suite, Unit | Text; no comma at the start | Stops double punctuation and spacing glitches |
| City | City name | Text; standard spelling | Improves readability and reduces returned mail risk |
| State | Two-letter state code | Text; use USPS abbreviations | Makes your line breaks predictable and neat |
| ZIP | 5-digit or ZIP+4 | Format cells as Text before entering | Preserves leading zeros so the merge prints correctly |
Connecting Excel to Word and inserting merge fields
In Word, open Mail Merge for Envelopes. Choose your Excel workbook as the data source and select the right sheet. This is the core of printing envelopes from Excel to Word.
Build the delivery block using merge fields in the right order. Double-check mapping. State and ZIP should be separate fields, and Address2 should sit on its own line only when it has a value.
Printing a batch: how to print 30 envelopes in Word reliably
If you’re asking how to print 30 envelopes in word?, treat it like a small production run. Print one test envelope first, confirm alignment, then run the full batch with the same tray, media type, and envelope size.
Feed envelopes in smaller sets if your printer tends to skew or jam. For inkjet printers, let the ink dry before stacking; for laser printers, check that toner is fusing cleanly so addresses don’t smudge during handling.
How to Print an Envelope in Word Online and Print Envelopes Online Free Options
Trying to print an envelope in Word online can be simpler than the desktop app. Word for the web is great for quick edits. But, it can be tricky for precise placement on envelopes like #10 or A7.
Many people use print envelopes online free tools for fast layouts. This is especially true for mailing a few pieces without printer troubles.
Limitations of Word for the web for envelope printing
Word for the web lacks the full Mailings controls of the desktop app. This makes envelope margins and address placement harder to set.
Even if your envelope looks good on screen, print output can shift. Browser print dialogs and printer drivers can move text slightly, causing issues.
Workarounds using templates and PDF export
Start with an envelope template, add your addresses, then export to PDF. PDFs print more consistently across different systems.
Before printing, check the PDF print dialog for scaling. Choose Actual size (or 100%) to avoid text shrinkage.
If you need to print envelopes online without hassle, keep a tested template for each size. This reduces errors and keeps spacing consistent.
When “print envelopes online free” tools make sense (and when they don’t)
For a one-off mailing, print envelopes online free tools are a good choice. They’re quick, work on a Chromebook, and offer a clean layout.
However, they’re less useful for strict branding or exact placement. Also, consider privacy and data retention, especially for client or patient information.
| Option | Best for | What to watch |
| Word for the web | Basic edits, quick typing, simple templates | Fewer layout controls, browser scaling can shift addresses |
| Template + PDF export | Repeatable printing across different devices and printers | Must print at actual size; verify envelope feed settings |
| print envelopes online free tools | One-time envelopes, no software install, fast formatting | Limited formatting, possible data privacy risks, inconsistent printer results |
When speed is key, print envelopes online free services are a good choice. But, for accuracy, a template plus PDF is often better.
Why Won’t My Envelopes Print in Word? Troubleshooting Common Problems
When envelope printing doesn’t work, it’s often a small issue. This could be a size mismatch, a wrong tray setting, or a driver that ignores Word’s requests. If you’re wondering, why won’t my envelopes print in word?, try these steps. Each one helps you find the problem step by step.
Misalignment, skewed text, and margin issues
Most problems start with the wrong envelope size or a flipped feed direction. Make sure the envelope size in Word matches the box size. Also, check your printer’s paper size setting, as the driver can change it.
Look for scaling options in your print dialog. If you see “Fit to page” or any scaling, turn it off. Printers have non-printable margins. If text is too close to an edge, adjust the address blocks until it looks right.
Printer driver problems and Word printing glitches
If your envelopes print wrong, it might be the printer driver. An outdated driver can change your envelope settings to a default letter profile. Update the driver in your operating system and then reselect the printer in Word.
Next, check if system print settings conflict with Word. For example, a saved preset for “Letter, duplex” can mess up envelope output. Choose a clean preset, set the correct paper size, and print again.
Envelope jams, smudging, and ink/toner rub-off fixes
Envelopes are thicker and less flexible than plain paper. Feeding too many at once can cause jams. Load fewer envelopes, flatten curled flaps, and use manual feed if your printer supports it. If your printer has a media type option, select “Envelope” to slow the feed and improve handling.
Smudging depends on the printer type. Inkjet prints may need more drying time, especially on coated stock. Laser prints can rub off if the media setting is wrong, so match the media type to help the toner fuse better.
| Problem | Likely cause | Quick fix |
| Text prints too high or low | Wrong envelope size or driver paper size mismatch | Match envelope size in Word and the printer driver, then adjust address position offsets |
| Text is sideways | Feed orientation set incorrectly | Flip the envelope direction and re-test using the same tray |
| Blank envelope output | Driver preset overrides Word settings | Pick a basic preset, disable scaling, and reselect the printer in Word |
| Jams at pickup | Too many envelopes or thick stock | Load 1–3 envelopes, use manual feed, and set media type to “Envelope” |
| Smudges or rub-off | Ink not dry or toner not fusing | Allow drying time (inkjet) or choose the correct media setting (laser) |
Testing with plain paper before using real envelopes
Before using real envelopes, test your layout on plain paper. Print the envelope once, then hold the sheet behind an envelope and check where the address lines land. This quick backlit check shows whether margins, offsets, and rotation are right.
Once the placement looks consistent, repeat the same settings without changes. If you still find yourself asking, why won’t my envelopes print in word?, the most useful clue is whether the test page matches what the printer does with real envelopes.
Conclusion
Learning to print an envelope in Word is easy and can be done over and over. First, choose the right envelope size. Then, write the addresses carefully. Use Print Preview to check everything before printing.
Good envelope printing also needs the right hardware settings. Make sure Word’s envelope options match your printer driver. Choose the correct tray or manual feed path. A test print on plain paper can find any mistakes before using real envelopes.
Custom envelope printing makes things consistent. Save your favorite fonts, placement, and return address block as a template. This way, every envelope looks the same, for business or personal use.
For large mailings, Mail Merge makes things faster. But the biggest help comes from the basics. Align Word settings with your printer driver and test placement before printing a lot. Following these steps makes printing envelopes in Word a smooth routine.
FAQ
How to print an envelope in Word for a single address?
Open Word and go to the Mailings tab. Enter the addresses and choose the envelope size. Make sure the feed direction is correct in the preview. Print a test envelope before printing more.
Where is the envelope printing option in Microsoft Word?
In desktop versions, go to Mailings > Envelopes. This window lets you set addresses and choose the envelope size. You can also adjust placement and print directly without extra pages.
How do I print just envelopes in Word without extra pages?
Print directly from the Envelopes window. If Word added an envelope page, use Print Preview. Select Print Current Page to avoid printing letter pages or blanks.
What’s the best envelope size to choose in Word for U.S. mail?
Use #10 for business letters. A2 and A7 are good for invitations and cards. Make sure the size in Word matches the physical envelope to avoid issues.
How do I set up custom envelope printing in Word (fonts, spacing, and placement)?
In Envelope Options, change fonts and adjust placement. Small changes can fix issues caused by printer tolerances, especially in batch printing.
Why won’t my envelopes print in Word, or why is the text misaligned?
Wrong envelope size, feed orientation, or printer settings are common causes. Check the size in Word and the printer dialog. Use 100% scaling and test on plain paper before envelopes.
How to print envelope in printer correctly when I’m unsure about feed direction?
Check the printer’s tray diagram for face up or down and flap orientation. Use the multipurpose tray or manual feed for thicker envelopes.
Can I use an envelope printing template Word users can reuse?
Yes. Save your layout as a Word template for consistent printing. Verify the template matches your envelope size before using it for a batch.
Where can I find a free envelope printing template Word file?
Microsoft’s template library and Word’s template search have envelope layouts. Download or open one, adjust fonts and placement to fit your printer’s area.
How to print multiple address on envelope in Word using Mail Merge?
Use Mail Merge for different recipients. Select Envelopes in Mail Merge, connect your list, insert fields, preview, and print a test before the full run.
How to print envelopes in Word from Excel without messing up ZIP codes?
In Excel, format ZIP cells with leading zeros. In Word Mail Merge, map fields correctly, preview, and print a test to confirm ZIP formatting.
How to print an envelope in Word online, and what are the limitations?
Word for the web has limited controls. Use an envelope template, type addresses, export to PDF, and print at “Actual size” for better results.
How to print an envelope in Word free without buying extra software?
If you have Microsoft 365, the Envelopes tool in Word works without add-ons. For Word Online, use a free template and PDF export for basic printing.
Leave a Reply