
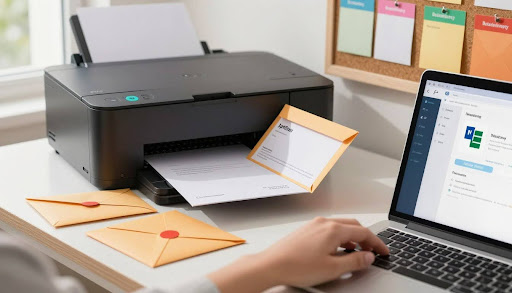
Looking for an easy way to print addresses on envelopes? This guide shows you how to do it using Microsoft Word, Excel, Google Docs, Adobe Acrobat, Apple Preview, and Canva. You’ll learn how to print envelopes at home on Windows or macOS without any hassle.
We’ll cover the best envelope sizes, like A2, A6, A7, #10, and Monarch. You’ll also learn how to load them correctly. Plus, we’ll tell you which printers work best and how to set them up right. You’ll even get tips for HP printers, like the HP DeskJet 2700 series.
By the end, you’ll know how to print envelopes from any app. You’ll learn how to format addresses to USPS standards and when to use templates or labels. This guide is perfect for small business owners or those sending holiday cards. It will help you go from trial and error to smooth results.
Key Takeaways
- Learn a step-by-step method for envelope printing in Word, Excel, Google Docs, Acrobat, Preview, and Canva.
- Understand printer compatibility, proper loading, and settings for clean results when you print envelopes at home.
- Pick the right envelope size—A2, A6, A7, #10, or Monarch—and match it in your print dialog.
- Apply media type and thickness settings to reduce smudging, skew, and jams.
- Follow USPS addressing basics for accurate, readable mail.
- Get specific tips for HP printers, including the HP DeskJet 2700 series.
- Decide when to use templates or labels to speed up high-volume jobs.
What You Need Before You Start: Printers, Envelopes, and Settings
Before starting your envelope printing, make sure your equipment, materials, and software are ready. Quick choices now can avoid waste, smudges, and jams later. Keep your printer’s guide handy to set up the right envelope print settings.
Compatible printer types for envelope printing
Most home and office printers can handle envelope printing if they list it in their specs. Look for printers from HP, Brother, Canon, Epson, and Lexmark. Printers with a rear feed or manual slot are best for thicker stocks and less skew.
Laser printers are fast and print crisp text. Inkjet models handle different media well and work on textured paper. Make sure your printer supports #10 and Monarch sizes, and many also accept A-series sizes.
Best envelope sizes (A2, A6, A7, #10, Monarch)
Pick a size that fits your needs. Popular sizes include A2, A6, A7, #10, and Monarch. These sizes are great for invites, cards, and business letters.
| Envelope size | Dimensions (inches) | Typical Use | Common Support |
| A2 | 4.375 × 5.75 | Note cards, RSVP | Many inkjet models with custom sizing |
| A6 | 4.75 × 6.5 | Postcard mailers, invites | Midrange inkjet and select laser units |
| A7 | 5.25 × 7.25 | Main wedding invite | Photo-capable inkjets, some lasers |
| #10 | 4.125 × 9.5 | Business correspondence | Widely supported by most brands |
| Monarch | 3.875 × 7.5 | Personal letters, stationery | Common on office-class printers |
How to load envelopes correctly in the paper tray
Prepare a small, even stack with flaps closed. Load envelopes in the tray following the icon on the printer: print side up or down varies by model. Align the long edge per the diagram, and slide the guides until they touch without bowing the sides.
For tricky stocks, feed one at a time through the manual slot or rear path. This reduces curl and helps prevent skew on textured or heavyweight options.
Recommended print settings: paper type, thickness, orientation
In your envelope print settings, pick Envelope or Card/Thick for media type. Set the exact size or enter custom dimensions to match A2, A6, A7, #10, or Monarch.
Choose portrait orientation for #10 and match the feed direction shown in the driver. Start with default quality on laser devices; on inkjet, use Normal or Best for small type, and allow longer drying on coated, dark, or metallic finishes.
Troubleshooting smudging, skew, and jams
For smudging, lower toner density on laser models or select a thicker media mode; on inkjet, increase dry time and avoid heavy ink coverage near folds. If you see skew, square the stack, fan the edges, and feed five to ten at a time or single-feed via the manual slot.
Jams often come from curled flaps or thick adhesive. Skip self-seal styles in tight paths and use the straightest route your device offers. These tweaks keep your envelope printing setup reliable with compatible printers for envelopes across common sizes.
How to Print on Envelopes in Word (Windows and Mac)
Microsoft Word makes printing envelopes easy and precise. Whether you’re using a PC or a Mac, the steps are similar. You can use built-in tools for sizing, fonts, and feed to ensure your mail looks professional.
Using the Mailings > Envelopes tool
Start by opening Word and navigating to Mailings > Envelopes. The Word Envelopes tool allows you to enter addresses and choose size and feed options. Click Add to Document to save the envelope as a page for later printing.
Setting return and delivery address formatting
Good envelope address formatting is key for readability and brand consistency. Use Fonts and Layout in Envelopes and Labels to select a clear font like Arial or Times New Roman at 10–12 pt. Center the delivery address and place the return address in the top-left corner, following USPS guidelines. Avoid using all caps unless necessary.
Selecting envelope size and custom dimensions
In Options, choose a standard size like #10 or Monarch, or set Custom Size with exact dimensions. This ensures proper alignment and prevents clipping or skewing on nonstandard sizes.
Saving and reusing an envelope printing template
After adding the envelope to your document, save it as a Word envelope template. Use .dotx format to reuse your layout with your logo, spacing, and fonts. This approach is efficient on both Windows and Mac, streamlining repeat jobs and maintaining consistency.
Fixing alignment issues and previewing before print
In Envelope Options > Printing Options, select the feed method that matches your device’s diagram. Test with plain paper cut to envelope size for reliable alignment. Use Print Preview in File > Print to check the layout at Actual Size or 100% scale. Adjust margins in Layout or switch feed orientation if needed. On Mac, use Cmd+P > Show Details to confirm the correct media size and path.
| Step | Windows | Mac | Why it matters |
| Open tool | Mailings > Envelopes | Mailings > Envelopes | Accesses the Word Envelopes tool for fast setup |
| Format addresses | Fonts & Layout: 10–12 pt, centered delivery, return top-left | Fonts & Layout: 10–12 pt, centered delivery, return top-left | Ensures clean envelope address formatting in Word |
| Select size | Options: #10, Monarch, or Custom Size | Options: #10, Monarch, or Custom Size | Matches envelope dimensions to prevent clipping |
| Save template | Save as .dotx Word envelope template | Save as .dotx Word envelope template | Makes repeat jobs consistent and quick |
| Alignment & preview | Printing Options + Print Preview at 100% | Printing Options + Show Details at 100% | Improves Word print alignment and placement accuracy |
How to Print on Envelopes from Excel
Make address work easier by using Microsoft Excel with Word. You’ll create an Excel mailing list, merge it with Word, and format addresses for the USPS. This method is quick, precise, and works well for many envelopes.
Creating a mailing list table with headers
In Excel, set up headers like FirstName, LastName, and Address1. Make the ZIP column Text to keep leading zeros. Save and close the workbook before merging.
| Header | Purpose | Formatting Tip | Example Entry |
| FirstName | Recipient first name | Capitalize first letter | Maria |
| LastName | Recipient last name | Capitalize first letter | Gonzalez |
| Company | Business line (optional) | Use full legal name | Microsoft |
| Address1 | Primary delivery line | No trailing punctuation | 123 MAIN ST |
| Address2 | Suite or unit (optional) | Leave blank if none | STE 400 |
| City | City name | Title case or uppercase | Seattle |
| State | Two-letter code | Uppercase (WA, CA, NY) | WA |
| ZIP | ZIP or ZIP+4 | Text format to keep zeros | 98101-1234 |
Mail Merge from Excel to Word envelopes
Open Word and go to Mailings > Start Mail Merge > Envelopes. Choose the envelope size and select your Excel mailing list. Add Merge Fields for each address part. Use special fields to skip empty lines, then arrange the address for Mail Merge envelopes.
Formatting addresses for USPS standards
Follow USPS address formatting rules: no punctuation on delivery lines, uppercase for State, and include ZIP+4 if possible. Use simple fonts at 10–12 pt and leave space for barcodes. These steps help scanners read your mail during batch envelope printing.
Batch printing envelopes for multiple recipients
Start batch envelope printing by selecting Finish & Merge > Print Documents. Use Edit Recipient List to filter by City or State for targeted runs. Test a small sample first to ensure correct alignment before the full print job.
Common merge errors and how to resolve them
- Invalid Merge Field: Header names must match exactly; remove hidden spaces or extra characters.
- Missing ZIP Zeros: Set the ZIP column to Text in Excel to keep leading zeros.
- Connection Failed: Close the Excel file and store it locally before opening in Word.
- Misaligned Output: Recheck envelope size and margins in Word; test a small subset before a full run.
Organize your data, link Word to your Excel mailing list, and follow USPS address formatting. This way, you can smoothly run Mail Merge envelopes and reliable batch envelope printing from start to finish.
How to Print on Envelopes from PDF
Get your address right by matching your PDF to the envelope before printing. You can use Adobe Acrobat, Foxit Reader, or macOS Preview. The key steps are size, scaling, and margins. This guide will help you print on envelopes from PDF easily.
Using Adobe Acrobat or free PDF readers
Open your PDF and choose the envelope in the printer driver. To print envelopes with Adobe Acrobat, select “Envelope” as the media type and check the feed orientation. Foxit Reader and Preview on Mac have similar controls, so you can keep settings the same on different devices.
Do a quick test on a blank to check the placement. If the address is off, adjust the artwork with Acrobat’s Edit PDF tools or change the layout in your design app. Then, export again.
Setting custom page size to match envelope
Accurate sizing is key to avoid scaling issues. Use a custom page size PDF that matches the envelope size, like #10 (4.125 x 9.5 in) or A7 (5.25 x 7.25 in). In Preview, go to Paper Size > Manage Custom Sizes and set the minimum non-printable margins your printer allows.
If there are no presets, define the envelope in the printer’s Properties. Use clear names so you can use the setup again for future mailings.
Print dialog options: Fit vs. Actual Size
The scaling choice is crucial. Pick Actual Size to keep the layout as is, especially for logos near the corner. If a driver forces Fit, make sure the document is the same size as the envelope so Fit equals 100%. This simple choice is often the cause of misalignment.
After choosing the right scale, make sure the preview shows the address block centered and clear of edges before sending the job.
Adjusting margins to avoid clipping
Set generous PDF margins for envelopes to keep ink within the printable area. If there’s clipping, reduce margins slightly or move text inward. Most desktop printers have 0.2–0.25 in unprintable edges; plan your layout with that buffer.
For edge cuts, reposition return and delivery lines a bit toward the center. Small shifts keep addresses legible and USPS-friendly.
| Task | Where to Set It | Recommended Choice | Why It Helps |
| Reader/App Selection | Adobe Acrobat, Foxit Reader, Preview | Any reputable reader | Ensures reliable drivers and consistent print handling |
| Envelope Size | Printer Properties or Page Setup | Preset (#10, A7) or custom page size PDF | Matches layout to the physical envelope, avoiding scale shifts |
| Scaling | Print Dialog | Actual Size | Prevents unwanted shrink/expand; key in Fit vs Actual Size |
| Margins | Source file or Edit PDF | PDF margins for envelopes with 0.25 in safe zone | Keeps text away from unprintable edges and stops clipping |
| Media & Feed | Printer Driver | Media: Envelope; Correct orientation | Improves pickup, reduces jams, and keeps alignment true |
How to Print on Envelopes in Google Docs
Here’s a simple way to print envelopes in Google Docs. You can use a built-in layout or create your own. Make sure fonts are clear, margins are safe, and test before printing.
https://www.youtube.com/watch?v=7hwPX9rsNJw
Using the Envelopes add-on
Get a Google Docs Envelopes add-on like Envelopes by Labelmaker. It lets you print #10, A7, and more with one click. It makes setting up envelopes easy with guides and the right orientation.
After setting up, fill in the details and check the spacing. The add-on keeps addresses aligned and sized right, saving you time.
Setting custom page size in Page Setup
For more control, go to File > Page setup and choose a custom size. Pick the exact size for #10, A6, or Monarch. Make sure margins are narrow so text is clear.
Use the ruler and grid view to place your content. This method is great for nonstandard sizes or special layouts.
Inserting and positioning address blocks
Type the recipient block and center it. Use 10–12 pt fonts for easy reading. Place the return address in the upper-left corner.
Keep line spacing at 1.0–1.15 and avoid fancy fonts. Simple fonts like Arial or Times New Roman work best for scanners.
Printing from Chrome and system dialogs
When you’re ready, go to File > Print. Choose More settings and then print from Chrome system dialog. Here, you can pick the exact envelope size or create a custom layout. Set media type to Envelope and confirm the feed path.
If alignment is off, adjust the top margin or text frame. A test on plain paper can save time and envelopes.
How to Print on Envelopes Canva
Design clean, postal-ready envelopes with a simple workflow. This guide shows how to print on envelopes Canva users create. From sizing the canvas to exporting a sharp file for your printer or a local shop.
Setting a custom canvas size for envelope dimensions
Start a new design and choose Canva custom size in inches to match the envelope. For example, a #10 envelope is 9.5 × 4.125 in. A7 is 7.25 × 5.25 in, and A6 is 6.5 × 4.75 in. Set orientation to landscape for #10 or as needed for the format you plan to feed.
Enable rulers and set margin guides about 0.25–0.375 in from all edges. This keeps text away from seams and flaps, reducing smears and clipping.
Adding address text, guides, and safe zones
Use a clear, dark sans serif or serif at 10–12 pt for addresses. Place the delivery address centered in the right half and the return address in the top-left. Drag guides to mark a Canva safe zone that avoids edges and any flap area.
Keep logos simple and high-contrast. Avoid very light colors. Align text blocks with guides so they remain consistent across a batch of envelopes.
Exporting for print: PDF Print vs. PNG
For sharp type and reliable alignment, choose Canva export PDF Print at 300 dpi with crop marks off. If available, use CMYK-compatible output for better predictability on pro devices. PNG at 300 dpi can work on many inkjets, but PDFs usually render crisper text on both inkjet and laser printers.
After export, print a single test on plain paper. Hold it over an envelope to confirm placement before running the full stack.
Does Canva print on envelopes?
The question “does canva print on envelopes?” comes up often. Canva’s print services focus on cards, flyers, and postcards. Direct printing on supplied envelopes is not commonly offered. Export your file, then print with your home or office printer using correct media settings, or bring the PDF to a print provider that supports envelope printing.
This path keeps your layout intact while taking advantage of Canva custom size controls, guide-based alignment, and the precision of Canva export PDF Print for clear, postal-friendly results.
how to print on envelopes
Use a universal envelope workflow to keep results consistent across different apps. This method helps you choose the best way to print envelopes. It also helps avoid waste and keeps text sharp and aligned.
Tip: Read your printer’s manual for the straightest feed path. Brands like HP, Brother, Canon, and Epson often offer a rear slot or manual feed. This reduces curl and smudge.
Step-by-step workflow for any app
- Confirm your printer supports envelopes and pick the straightest feed path.
- Choose the correct envelope size (A2, A6, A7, #10, Monarch) and measure to confirm.
- Set the document or canvas to the exact dimensions.
- Place delivery and return addresses per USPS guidelines using readable fonts.
- Set the driver to Envelope media, correct thickness, and proper feed orientation.
- Print a test on plain paper cut to size.
- Load 1–5 envelopes with guides snug and the flap closed.
- Print at Actual Size to prevent scaling.
- Inspect for alignment and smudging; adjust settings if needed.
This universal envelope workflow applies whether you design in Canva, draft in Google Docs, finalize in Adobe Acrobat, or format in Microsoft Office. It standardizes steps so you can avoid envelope printing waste.
Choosing the right method based on your tools
- Word’s Envelopes tool is fastest for single pieces and quick edits.
- Excel with Mail Merge to Word is best for batch runs with many recipients.
- PDFs in Adobe Acrobat or Preview are ideal when the layout is locked and press-ready.
- Google Docs suits cloud teams that share templates and print from Chrome.
- Canva works well for styled layouts with guides and safe zones.
Match your needs to the app to choose best envelope method. If you need speed for one-off mail, use Word. For branded designs, export from Canva to PDF and print without scaling.
Avoiding common pitfalls and waste
- Avoid wrong page size and auto-scaling; always print at Actual Size.
- Do not feed too many at once; small stacks reduce skew and jams.
- Avoid printing over glue seams; shift artwork and address blocks away from thick areas.
- Let ink dry on coated or dark stocks; pigment takes longer to set.
- Use driver presets and record a working setup to repeat success.
Keep a few spare envelopes for tests, and save a preset once alignment is dialed in. Small checks early help avoid envelope printing waste while delivering clean, professional results.
Free Envelope Printing Template Options
Save time with a free envelope printing template for common sizes. Choose the right format for your stock—#10, A7, or Monarch. This ensures addresses are in the right spot and prints cleanly the first time.
Tip: Keep a master file for easy reuse and sharing with your team. It speeds up repeat mailings.
Downloadable Word and Google Docs templates
Begin with a Word envelope template from Microsoft’s gallery on Office.com. Or, choose a Google Docs template from the Template Gallery or trusted add-ons. Both options make it easy to match #10 business, A7 invitations, or Monarch sizes.
These templates are simple to edit and print on Windows, macOS, and ChromeOS. Save your customized version for future mailings.
USPS-compliant addressing layouts
Opt for a USPS compliant template. It has the return address in the upper-left, delivery address centered, and a clear zone for barcodes. This reduces errors and keeps your design tidy.
- Use consistent line order for the delivery block.
- Keep logos small and out of critical read areas.
- Maintain 0.25–0.5 inch margins to prevent clipping.
Customizing fonts, spacing, and alignment
For a sharp look, customize fonts and spacing. Use clean typefaces at 10–12 pt and set line spacing to 1.0–1.15. Align the delivery block to center and the return to left. Lock guides to prevent changes before printing.
Whether you use a Word or Google Docs template, save your final setup. This keeps your branding and layout consistent across mailings.
How Do I Set My Printer to Print Envelopes?
Getting clean, professional results starts in the driver. To print envelopes, match size, stock, and path before printing. Follow your device diagram, choose the right stock, and keep the path straight for fewer jams and sharper text.
Selecting envelope media type and thickness
Open your printer driver and pick the envelope media type. On many HP, Brother, Canon, and Epson models, choosing Envelope or Heavy/Thick slows the rollers and tunes fuser or ink flow. If paper weight is offered, select the closest range, such as 20–28 lb, to limit curl and reduce smudging.
Set the exact envelope size or a custom size that matches #10, A7, or your chosen format. This helps the printer place the address where you expect and improves edge registration.
Changing feed orientation (short-edge vs. long-edge)
Check the tray icon or guide sticker to confirm the correct printer feed orientation. Many desktop units prefer short-edge first for #10, but some models flip that for square flaps. Align the flap direction as shown, and keep guides snug to prevent skew.
Before a full batch, run one test page. A quick check avoids waste and confirms that return and delivery lines land in the safe zone.
Using rear manual feed slots
For thick, textured, or foil-lined styles, use the rear manual feed slot. This straighter path avoids tight turns and keeps embossing clean. Feed one envelope at a time, face and flap as indicated by the device diagram, to maintain consistent pressure and tracking.
If you see waviness or streaks, pause and fan the stack. A light fan reduces static and improves pickup without bending corners.
Saving presets for quick printing
Once settings work, save print presets so the setup is one click next time. In Windows, look under Printing Preferences and use Profiles or Shortcuts, depending on the brand. On macOS, after choosing size, envelope media type, quality, and portrait orientation, select Presets and Save Current Settings as Preset—name it “#10 Envelope.”
Including the correct size, printer feed orientation, and selected manual feed slot in that preset makes repeat jobs faster and more reliable.
How to Print Directly onto an Envelope
Here’s a simple guide on printing directly onto an envelope. You can avoid jams and smudges by setting the right print settings. Also, keep the envelopes flat and choose the best feed path for clean prints.
Manual feed versus tray feed best practices
For exact placement, manual feed envelopes one at a time through the rear slot. Make sure guides are snug, the flap is closed, and the envelope is flat. This method helps avoid skew and reprints.
Tray feed is good for standard #10 envelopes on Brother, Canon, Epson, and HP models. Keep the stack height low, fan it to prevent double-feeds, and load it print-side up as shown in the printer diagram.
Avoiding curl and ink bleed on specialty stocks
Keep envelopes flat and sealed in their packaging to prevent curl. Print in low humidity. Use Thick or Heavy mode on laser devices to lower fuser heat and prevent warping. On inkjet, choose Matte or Plain to avoid ink bleed.
For glossy, dark, or textured envelopes, use pigment ink for faster drying and sharper prints. If you still see feathering or slow drying, print a test first. Then, lower the print quality to balance coverage and clarity.
When to use labels instead
Use labels for metallic, linen, or heavily textured stocks that resist clean coverage. Or when addresses smear in transit. That’s when to use address labels from brands like Avery for high contrast and durability.
Design with Word or Avery Design & Print templates for exact alignment. Then apply the label to the envelope after printing. This method combines the look you want with the reliability you need, while still showing how to print directly onto an envelope for standard jobs.
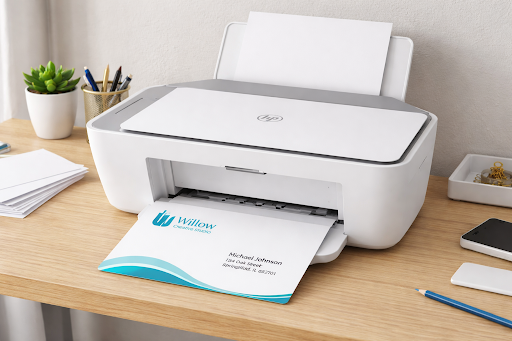
How to Print on an Envelope with HP Printer
Here’s a simple guide on how to print on an envelope with your HP printer. You can use built-in tools and driver controls. These steps ensure your prints are both fast and clear, working for OfficeJet, ENVY, DeskJet, and LaserJet models.
HP Smart app and driver settings
Start with HP Smart, choose Print Documents, and select your envelope file. Then, go to Advanced or Printer Properties. Here, pick Media as Envelope and choose the right size or set a custom one. This makes sure your envelopes fit perfectly.
For more detailed settings, use HP driver envelope settings. Make sure to check your device model. Then, set Orientation and turn off scaling to avoid address shifts. Save these settings for future use.
Media type, print quality, and feed path
For OfficeJet, ENVY, and DeskJet, load envelopes in the main or rear tray as shown in the guide. Choose Quality as Normal for speed or Best for sharp text and barcodes. LaserJet users should pick Paper Type Envelope and set fuser mode to Thick for heavy stocks, using the bypass tray.
If you see ink marks, try changing media. Many smudge cases improve with Plain Paper at Best quality and extra drying time. For LaserJet shine or offset, lower print density or use Labels/Envelope to adjust fuser heat.
Fixing skew and smudges on HP devices
To fix skew issues, load one envelope with side guides tight to the edges. Fan the stack and feed envelopes one at a time if needed. Use HP Smart’s Printer Maintenance to clean rollers and improve grip.
For smudges, first check media type, quality, and feed path. If marks still appear, replace worn envelopes and avoid glossy coatings on inkjet. Follow your model’s size chart and feed direction diagram.
| HP Model Type | Feed Path | Media/Driver Setting | Quality Choice | Skew/Smudge Fix |
| OfficeJet / ENVY / DeskJet | Main or rear tray per guide | Media: Envelope; exact size or custom via HP driver envelope settings | Normal for speed; Best for sharp text | fix skew HP: tighten guides; clean rollers; HP smudge envelope: Plain Paper + Best, allow dry time |
| LaserJet | Bypass tray preferred | Paper Type: Envelope; fuser mode: Thick if needed | Standard; increase only if text looks light | fix skew HP: feed single envelope; HP smudge envelope: lower density or use Labels/Envelope type |
| All Models | Single-envelope feed for precision | Use HP Smart app envelopes presets; save a custom preset | Match job needs; avoid unnecessary scaling | Confirm supported sizes and feed direction diagrams in HP resources |
Tip: Create a reusable preset for printing envelopes. This includes HP Smart app envelopes and driver settings. It ensures every print job starts off right.
How to Print on Envelopes HP DeskJet 2700
Want sharp addresses with little waste? Start with the right media and setup. This guide shows how to print on envelopes for HP DeskJet 2700 users every day. It covers HP DeskJet 2700 envelope size support, loading tips, and print settings to avoid smears and skew.
Tip: A quick check of the user guide confirms supported sizes. This simple step also lowers the chance of an HP misfeed jam envelope event.
Supported sizes and loading orientation
The series supports common sizes like #10. If an HP DeskJet 2700 envelope size is not listed, avoid it, especially very small options like A2. Choose clean, increased envelopes with strong seams.
- Load into the main input tray with the print side down.
- Place the flap left or up as shown on the tray icon, then snug the guides.
- Feed a small stack or single pieces to keep edges square.
Exact print dialog settings to select
Correct DeskJet 2700 print settings prevent scaling errors and fuzzy text. Match the app and driver selections to the envelope you loaded.
- Paper Size: #10 Envelope; if not available, use Custom to exact dimensions.
- Paper Type: Envelope or Plain to control ink laydown and feed speed.
- Orientation: Portrait for standard addressing placement.
- Quality: Normal for speed or Best for crisp lines.
- Scaling: 100% with “Fit to page” disabled to retain alignment.
Resolving paper jam or misfeed messages
When an HP misfeed jam envelope alert appears, pause and check the stack. Fan a few envelopes, remove curled pieces, and try one at a time. Power off before clearing any blockage.
- Open the rear or output path per the manual and remove scraps or adhesive.
- Clean pick rollers using HP Smart maintenance tools if misfeeds persist.
- Select a slightly heavier media type to slow feed and improve grip.
| Step | #10 Envelope or Custom | Matches layout to actual media | Verify HP DeskJet 2700 envelope size in the guide |
| Type | Envelope/Plain | Optimizes feed and ink | Helps avoid HP misfeed jam envelope issues |
| Orientation | Portrait | Aligns address blocks correctly | Works with typical return/delivery placement |
| Quality | Normal or Best | Balances sharpness vs. speed | Best for small fonts and barcodes |
| Scaling | 100% (no Fit) | Prevents clipping or drift | Key DeskJet 2700 print settings detail |
| Loading | Print side down, flap left/up | Ensures proper path through rollers | Adjust guides snug to edges |
| Troubleshoot | Fan stack, clear path, clean rollers | Stops repeats of jams | Use HP Smart tools if misfeeds continue |
Where Can I Print Address on Envelopes for Free
Looking for a place to print address on envelopes for free without losing quality? You can find great options by using community resources, retail stores, and online tools. Just remember to plan ahead, bring your envelopes, and check if they accept special types of media.
Libraries, community centers, and campus labs
Many libraries offer free printing, but the rules can change. You might need to bring your own envelopes and ask about sizes. Library staff can help you with the process.
Community centers and university labs also provide free printing, but with limits. Students might get free pages, while guests might need to pay. Always check if they allow envelopes or suggest using labels instead.
Retail options and low-cost alternatives
The UPS Store, FedEx Office, and Staples charge for printing envelopes. Some have self-serve machines for cheaper printing, but not all accept your envelopes. It’s best to ask about staff-assisted printing and any current deals.
If envelopes are not allowed, consider printing address labels. This way, you can avoid jams and keep costs down. It’s a good backup when free envelope printing is not available.
Online template tools at no cost
Microsoft, Google Docs, and Avery Design & Print offer free envelope templates. These tools help you create USPS-friendly designs. Just export your PDF and take it to a library that supports envelope printing.
This approach lets you design your envelopes while using local printing services. It’s a cost-effective way to ensure your envelopes look professional and easy to read.
| Option | Typical Cost | Envelope Support | What to Bring | Best For |
| Public Library | Free daily pages or low per-page | Often manual feed; policies vary | Envelopes, library card, PDF or DOCX | where can i print address on envelopes for free |
| Community Center | Usually free or minimal fee | Limited sizes; staff assistance | Envelopes, USB drive, ID if required | free printing envelopes with guidance |
| Campus Lab | Student quota; guest fees vary | Depends on lab rules | Student ID, envelopes, finalized file | Consistent, low-cost envelope printing |
| The UPS Store / FedEx Office | Per envelope or setup charge | Staff-run; self-serve limits common | Envelopes if allowed, print-ready PDF | Urgent jobs and pro alignment |
| Staples | Low to moderate; promos at times | Staff-run preferred for envelopes | Clear specs, sample print, envelopes | Reliable, low-cost envelope printing |
| Online Templates | Free | Design/export only | online envelope templates free, final PDF | DIY design to print at library printing |
Will Staples Print on Envelopes for You?
Yes, Staples can print on envelopes for you. You can get this service at the Print & Marketing Services counter. To ensure great results, bring the right files and follow some simple steps.
What to bring: file types, fonts, and sample
Start with a press-ready PDF. High-resolution DOCX is also okay, but make sure fonts are embedded or outlined. If embedding fonts isn’t possible, bring fonts file sample to avoid any mistakes.
Also, bring a printout or a proof image. This will show exactly where and how big your design should be.
Check if the store accepts your envelopes and the minimum order. Some places might only use their own stock for certain prints, especially if they’re dark or textured.
Turnaround times and pricing considerations
For standard sizes and black text, same-day service is common. But, specialty colors, big orders, or custom designs might take longer. Staples’ pricing can vary based on several factors, including location, quantity, and ink use.
Ask for a price quote before you agree to the job. Find out if there are discounts for bigger orders and if they offer rush services.
Proofing and color accuracy tips
Ask for a color proof envelopes to check the print quality. Use a CMYK-ready PDF or Pantone colors for exact colors. This ensures your brand looks right on different envelope stocks.
Make sure your design has enough space around it. If it goes right to the edge, ask about trim or bleed options for your envelope.
| Item | Best Practice | Why It Matters |
| File Format | PDF (CMYK), high‑res DOCX as backup | Reduces reflow and preserves layout during Staples envelope printing |
| Fonts | Embed/outline; or bring fonts file sample | Prevents substitutions and spacing shifts |
| Proof | One test print on actual stock | Verifies color and placement before full run |
| Timing | Confirm same‑day vs. multi‑day | Sets expectations for Staples turnaround pricing and deadlines |
| Stock Policy | Ask about client‑supplied envelopes | Some stores guarantee only in‑house stock |
Can Printers Print on an Envelope?
Most home and office printers from HP, Canon, Epson, and Brother can print on standard #10 and A7 envelopes. But, the quality depends on the printer’s technology, how it handles paper, and the envelope’s surface.
Laser vs. inkjet differences
Laser printers use heat and a fuser to print crisp text. However, they can curl the envelope’s flaps or cause toner to flake on thick stocks. Inkjet printers, on the other hand, lay down liquid ink. They work well on uncoated paper but might bleed on glossy finishes.
Tip: For photos or solid colors, pigment inkjets from Epson or Canon are best. For lots of black text, a laser printer from HP or Lexmark is better.
Envelope compatibility and thickness limits
Always check if your printer supports the envelope size and thickness you need. Heavy or textured envelopes can cause jams in compact printers. Also, coated or metallic finishes can slow down drying or affect toner adhesion.
- Check the device’s max gsm and recommended envelope types.
- Use straight-path feeds when possible to reduce curl.
- Test one piece before a full batch run.
When to use specialty envelope feeders
A specialty envelope feeder or rear bypass tray helps with straighter paths and better grip. This improves print quality and reduces smudges. High-volume office printers often come with these feeders for reliable printing.
For metallic or textured envelopes, labels or a commercial print shop might be better. This is especially true if drying or adhesion issues persist, even with a specialty feeder.
| Printer Type | Best For | Watchouts | Feeding Method | Ideal Stocks |
| Laser (HP, Lexmark, Xerox) | Sharp text, fast batches | Curl and toner flaking on textured or thick stocks | Straight path or specialty envelope feeder | #10, A7 uncoated, smooth wove |
| Inkjet Pigment (Epson, Canon) | Clean lines, better smear resistance | Possible banding on glossy coatings | Rear manual feed or bypass tray | Uncoated, matte, cotton blends within envelope thickness limits |
| Inkjet Dye (Brother, Canon) | Everyday mailings and light graphics | Ink bleed on coated and glossy envelopes | Rear feed; single-piece loading | Standard #10 and A2/A6 uncoated |
| Production with Feeder (Ricoh, Kyocera) | High-volume, consistent alignment | Requires setup and correct profiles | Dedicated specialty envelope feeder | Wide range; verify thickness and finish compatibility |
Conclusion
This guide on how to print on envelopes wraps up nicely. Make sure your document fits the right size, like A2 or #10. Also, choose the correct media type and feed envelopes as your printer likes.
Word is great for printing one envelope at a time. Excel with Mail Merge is perfect for many envelopes. PDFs keep your layout safe, Google Docs is quick, and Canva offers stylish designs ready for printing.
Always follow USPS rules for clear addresses. Use presets for size, orientation, and paper thickness. Then, test print a blank envelope to check everything is right.
If your paper is thick or textured, try feeding it from the back. If ink bleeds or the paper curls, labels might be better. Or, you could go to a retail print shop.
This summary of envelope printing tips reminds us to avoid waste. Pick the right size, check margins, and keep feed paths clean. For the best results, check your printer’s manual, from brands like HP or Canon.
By following these steps, you can print sharp, professional envelopes easily at home or in the office. This guide is your go-to for the next time you need to print envelopes.
Before you start, set the size, media, and layout. Then, print with confidence. It’s all about aligning settings, stock, and feed for reliable results every time.
FAQ
What envelope sizes work best?
Common U.S. sizes include A2 (4.375 × 5.75 in), A6 (4.75 × 6.5 in), A7 (5.25 × 7.25 in), #10 (4.125 × 9.5 in), and Monarch (3.875 × 7.5 in). Most home and office printers reliably support #10 and Monarch; check the manual for A-series compatibility.
How do I load envelopes correctly?
Load with flaps closed and the print side up or down per the tray icon. Align the long edge as shown on the device diagram and set the guides snugly without bending. For best accuracy, use a manual or rear feed path and feed one at a time.
What print settings prevent smudging and jams?
Select Envelope or Thick/Heavy media, avoid “Fit to page,” and print at Actual Size. For inkjet smudges, use Normal/Best and allow extra drying time. For laser smudges or curl, reduce print density or choose Thick mode. Feed small stacks or single envelopes to avoid skew and jams.
How to format addresses to USPS standards?
Place the delivery address centered and the return address in the upper-left. Use clear fonts at 10–12 pt, keep the bottom clear zone free, minimize punctuation on delivery lines, and use uppercase for state and ZIP+4 if desired for machine readability.
How to print directly onto an envelope vs. using labels?
Direct printing looks polished if your printer supports envelopes and the stock isn’t too thick or textured. If ink bleeds on metallic, pearlized, or heavily textured envelopes, switch to high-contrast Avery address labels or clear labels using a matching template.
How to print on an envelope with an HP printer?
In HP Smart or Printer Properties, set Paper Size to your envelope and Media Type to Envelope. Use Normal or Best quality. For LaserJet, select Envelope type and the bypass tray. Fix skew by tightening side guides and, if needed, cleaning rollers via HP Smart maintenance.
How to print on envelopes with an HP DeskJet 2700?
Load #10 envelopes in the main tray print side down, flap as indicated by the tray icon. In the dialog, choose #10 Envelope (or Custom), Paper Type Envelope/Plain, Portrait orientation, and 100% scaling. If “load paper” or jams occur, fan the stack, feed one at a time, and clean pick rollers.
How to print on envelopes from PDF, Word, and Excel with one universal workflow?
Match the document size to the envelope, place addresses per USPS guidelines, select Envelope media, set the correct feed orientation, and print at Actual Size. Test on plain paper cut to size, then print 1–5 envelopes with guides snug. Adjust if alignment drifts.
Where can I print addresses on envelopes for free?
Many public libraries, community centers, and campus labs offer free or low-cost printing. Bring your own envelopes and ask about specialty media policies. If direct envelope printing isn’t allowed, print USPS-compliant address labels instead.
Will Staples print on envelopes for you?
Yes, via Staples Print & Marketing Services at the counter. Bring a PDF and a sample. Same-day is common for standard jobs; pricing varies by quantity and setup. Confirm if they accept your envelopes or require purchasing theirs and request a test print for alignment and color.
How to use a free envelope printing template?
Download templates for #10, A7, or Monarch from Office.com or Google Docs add-ons. Ensure USPS layout compliance, customize fonts (10–12 pt), keep margins at least 0.25–0.5 in, and save your version as a reusable template.
How do I fix alignment issues and skew?
In Word, adjust Printing Options to match the feed method; in PDF/Preview, confirm custom size and orientation. Square the envelope stack, fan edges, set guides tight, and use manual or rear feed. Print a single test, then fine-tune margins or positioning as needed.
How to print on envelopes Google Docs without add-ons?
Set File > Page setup > Custom to your envelope size, place address blocks with rulers and grid, then print using the system dialog to select the exact paper size, Envelope media type, and correct feed direction.
How to print on envelopes from Excel without Mail Merge?
Use an address label template sized to your envelope in Word or print selected cells formatted as an envelope layout. For reliable placement and USPS formatting, Mail Merge is still recommended for batches.
How to print on an envelope with an HP printer when ink smears?
Choose Plain Paper and Best quality, allow more drying time, and avoid glossy or coated envelopes with dye inks. If smearing persists, try pigment-ink models or switch to labels for specialty envelopes.
How do I print directly onto an envelope from a PDF and keep 100% scale?
Set a custom page size that matches the envelope, choose Actual Size in the print dialog, disable Fit or Shrink, set Media Type to Envelope, and verify the feed orientation matches the driver diagram.
Leave a Reply