
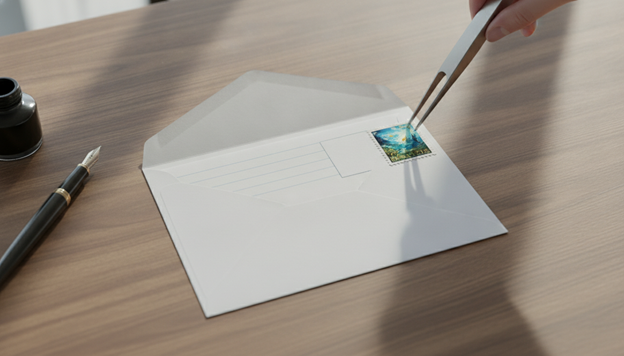
Mail seems simple until a letter comes back stamped “Return to Sender” or arrives days late. This guide shows where to put a stamp on an envelope so your mail moves cleanly through USPS processing and reaches its destination on time.
Proper postage placement means putting the stamp on the address side of the envelope, in the spot USPS equipment expects to find it. When the stamp is easy to see and not blocking key markings, your envelope is more likely to sort fast and avoid handling errors.
You’ll also learn how to mail a letter envelope with fewer surprises. We’ll cover how USPS sorting works, the exact stamp location for standard and nonstandard envelopes, and clear addressing rules that improve readability.
We’ll finish with postage basics, including how many stamps to use and how to place multiple stamps neatly. The steps in this article follow USPS standards in the United States and work for everyday letters, invitations, and business mail.
Why Stamp Placement Matters for USPS Delivery
Stamp placement is not just a style choice. USPS relies on consistent zones on each mailpiece, so machines can find the address, return address, and postage fast. If you’re learning how to mail a letter envelope, using these zones keeps your letter moving through the system with fewer stops.
Design can still matter, especially with custom envelopes. The key is to keep the front clean, high-contrast, and easy to read. Decorative borders, dark patterns, and crowded layouts can blur the “reading area” that automation depends on.
How USPS sorting equipment reads your envelope
Automated sorting looks for the destination address block first, then checks the upper-right corner on the front for postage. That predictable layout helps the equipment face the mail, scan it, and route it to the right processing stream.
Clear contrast matters. Dark ink on a light background, a flat surface, and open space around the address all improve readability. With custom envelopes, a simple address panel and minimal visual clutter can prevent misreads and extra handling.
What happens when stamps are placed incorrectly
When a stamp lands outside the expected area, the piece can slow down or get pulled for manual processing. In some cases, USPS may assess postage due or reject a piece that doesn’t meet mailing standards for placement and format.
Incorrect placement can also interfere with cancellation marks, barcode spraying, and automated scanning. If you’re figuring out how to mail a letter envelope for invitations or announcements, keep the stamp clear of the address block and any printed graphics that crowd the top-right corner.
Common causes of delayed or returned mail
- Stamp placed on the back or the wrong side of the envelope
- Stamp overlapping or sitting too close to address text
- Busy designs on custom envelopes that reduce contrast and shrink the clear reading area
- Shiny or glossy materials that cause glare and scanning errors
- Missing or unclear return address when it’s needed for routing problems
Creative layouts can look great, but they often trigger non-machinable handling when they disrupt the standard zones. For many custom envelopes, a clean front design and predictable stamp area help USPS equipment process the piece at normal speed.
| Mailpiece detail | What USPS equipment expects | What can go wrong | Result you may see |
| Postage location | Upper-right corner on the front | Stamp on the back or near the address block | Manual handling, slower processing, possible postage-due review |
| Address “reading area” | High contrast and open space around the delivery address | Patterns, dark colors, or crowded graphics on custom envelopes | Scanning errors, misroutes, delayed delivery |
| Surface finish | Matte or non-glare surface that stays flat | Glossy coatings or reflective paper | Barcode and optical read issues, extra sorting steps |
| Return address clarity | Legible return address when required for forwarding or returns | Missing, tiny, or low-contrast return address | Harder to return if undeliverable, longer delays |
Where to Put a Stamp on an Envelope
Most mailing issues start with small placement errors. If you’re unsure where to put a stamp on an envelope, follow one simple rule: keep postage on the front, in the upper-right corner, every time.
Correct placement: upper-right corner on the front
Place the stamp upright in the top-right area on the front (the address side). Press it down firmly, and don’t cover it with tape or a label.
Make sure the stamp sits fully on the paper and does not hang over an edge. A stamp that curls or peels can cause scanning trouble and slow down delivery.
What side of an envelope do you put stamps on?
What side of an envelope do you put stamps on? Use the same side as the recipient address, not the flap side.
Sorting equipment expects postage in the top-right on the front. When postage is placed on the back, it may be missed, marked incorrectly, or delayed.
Spacing tips so the stamp doesn’t cover important markings
Leave clear space around the stamp and keep it away from busy designs near the top-right corner. This matters even more with custom envelope printing that adds logos, patterns, or dark ink.
Give the address block room, too. A clean “quiet area” helps USPS apply cancellation marks and barcodes without covering key lines.
What to do with square envelopes and oversized envelopes
Square, thick, or oversized envelopes often count as nonstandard and may need extra postage, even if stamp placement is perfect. Keep the stamp in the upper-right on the front, then confirm the rate before you mail it.
This comes up often with wedding invitations, greeting cards, and marketing pieces made with custom envelope printing. If the piece feels rigid or bulky, check size and weight at a USPS retail counter or with USPS postage tools.
| Envelope type | Stamp location | Spacing to protect address and markings | Postage watch-outs |
| Standard letter (rectangular, flexible) | Front, upper-right corner, upright | Keep top-right clear; avoid overlapping graphics near the stamp area | Usually one Forever Stamp if it meets weight and thickness limits |
| Square invitation envelope | Front, upper-right corner, upright | Leave extra blank space for cancellation and barcode printing | Often non-machinable; may require an added surcharge |
| Large flat mailer (manila or oversized) | Front, upper-right corner, fully adhered | Keep postage away from seams and thick edges that can cause peeling | Price depends on size and weight; may need multiple stamps |
| Design-heavy front (custom envelope printing) | Front, upper-right corner, upright and uncovered | Avoid dark ink behind the stamp and keep the address area high-contrast | Busy layouts can interfere with scanning; clean zones help processing |
How to Write Address on Envelope for Post
Knowing how to write address on envelope for post is just as important as placing the stamp. Both steps help USPS scanners read your mail fast and cut down on returns.
With custom envelopes, the design can look great, but the address area still needs clean space. A clear layout keeps your letter moving through automated sorting.
Recipient address placement and formatting (US standards)
Place the recipient address on the front, centered side to side. Keep it in the lower-middle area so it stays away from the stamp and top edge.
Use a simple three-line format. Keep lines straight, evenly spaced, and easy to scan.
- Name or business name
- Street address (or P.O. Box)
- City, state, ZIP Code
Return address placement and when it’s required
Put the return address in the upper-left corner on the front. Make it smaller than the recipient address, but still clear.
It’s strongly recommended for business mail, invitations, and time-sensitive paperwork. It also helps when you’re using custom envelopes and want undeliverable mail sent back instead of discarded.
Using ZIP+4, abbreviations, and legibility best practices
ZIP+4 can improve sorting accuracy when you have it. Use standard two-letter state abbreviations like CA or NY.
Print neatly or use block-style writing. Choose dark ink on a light background to reduce scanning errors, especially if custom envelopes use colored paper.
What to avoid: stickers, glossy ink, and confusing layouts
Avoid stickers, wax seals, and heavy artwork near the address or postage areas. These details can confuse scanners or smear during processing.
Skip glossy finishes, metallic markers, and low-contrast ink. Also avoid diagonal text, addresses too close to edges, or splitting the address around a logo—common mistakes when learning how to write address on envelope for post on custom envelopes.
| Envelope detail | USPS-friendly choice | Risky choice that can slow delivery | Better option for custom envelopes |
| Recipient address location | Centered, lower-middle front | Too high, too low, or near edges | Reserve a clear “address block” area with no artwork behind it |
| Return address location | Upper-left front, smaller type | On the back flap only | Match the font to the design but keep strong contrast |
| Ink and readability | Dark ink on light paper, clean print | Metallic ink, pale colors, cursive that blends in | Use a simple printed label-style layout without stickers |
| Decor near address and stamp | Blank space around address and top-right corner | Stickers, seals, or art touching the address lines | Keep design elements as a border, not under the text |
| ZIP format | ZIP Code or ZIP+4 when available | Missing ZIP or wrong state abbreviation | Verify the last line before printing batches of custom envelopes |
How Many Stamps to Put on an Envelope and Postage Basics
Before you drop a letter in the mailbox, it helps to confirm the basics: mail class, weight, size, thickness, and whether it can run through USPS machines. Those details decide how many stamps to put on an envelope, even when everything else looks “standard.”
When one Forever Stamp is enough
One Forever Stamp typically covers a First-Class Mail letter that weighs 1 ounce and meets USPS letter standards. That means a normal rectangular envelope, flexible paper, and a smooth, flat feel.
Rates can change over time, but a Forever Stamp still counts toward the 1-ounce First-Class letter price. If your envelope stays within the usual size and thickness limits, one stamp is often all you need.
Do I need a stamp to send a letter in the same state?
Yes—do i need a stamp to send a letter in the same state is a common question, and USPS still requires postage. Mailing across town uses the same First-Class system as mailing to another state.
Distance inside the U.S. doesn’t remove the need for a stamp on a letter. The key factors stay the same: weight, shape, and whether it can be processed by machine.
Weight, thickness, and non-machinable surcharges
Once a letter goes over 1 ounce, it needs more postage. Thickness matters too, because bulky or rigid envelopes can trigger extra fees.
Common reasons a piece becomes non-machinable include wax seals, buttons, ribbons, bulky enclosures, or square invitation envelopes. If it can’t bend or it feels uneven, it may cost more than a basic letter.
When to use additional ounce stamps or extra postage
If you’re figuring out how many stamps to put on an envelope, start by weighing it on a kitchen scale. Add “additional ounce” postage for each ounce above the first, and add extra postage if the envelope is non-machinable or outside standard dimensions.
To avoid postage-due mail, confirm the final price before sending. USPS retail counters and postage calculators (online or at self-service kiosks) help match the stamp amount to the exact weight and shape.
| Mail piece check | What to look for | What it may change |
| Weight | 1 oz vs. over 1 oz (use a scale) | May require additional ounce postage |
| Thickness and rigidity | Stiff inserts, gift cards, stacked paper, uneven lump | May trigger a non-machinable surcharge |
| Shape | Square envelopes and tall, narrow formats | May cost more than a standard letter |
| Surface and closures | Wax seals, ribbons, textured wraps, bulky closures | May require extra postage to process correctly |
If you’re still asking, do i need a stamp to send a letter in the same state, the answer stays the same: yes, and the right amount depends on the letter’s weight and machinability. Checking those details up front keeps your mailing smooth and predictable.
How to Put Multiple Stamps on an Envelope Without Errors
Multiple stamps come up when your letter is heavy, thick, or nonstandard, or when you’re mixing denominations to hit the exact USPS rate. Knowing how to put multiple stamps on an envelope starts with the same rule you use for where to put a stamp on an envelope: keep postage on the front and easy to spot.
Cluster stamps in the upper-right area so canceling ink lands cleanly. Place them in a neat row or a tight block, with no overlap and no curled corners. Press each stamp flat so the adhesive bonds, especially on textured paper or coated stock.
Give the address and barcode zones room to work. Avoid placing stamps near the recipient address, and keep clear of the bottom edge where USPS often prints routing barcodes. For clean processing, don’t let stamps wrap over an edge or sit on a seam, and skip the back flap side entirely.
| Mailing goal | Where postage should go | What to avoid |
| Heavy letter needing extra postage | Front, upper-right area; stamps aligned in a single row | Stamps touching the address block or creeping into the top margin |
| Large or square envelope | Front, upper-right area; stamps in a compact block to save space | Stamps on edges, corners, or across envelope seams |
| Custom printed business envelope | Front, upper-right area; leave a clean blank margin for stamps | Covering logos, artwork, or printed indicia markings with stamps |
| Batch mail like wedding invitations | Front, upper-right area; consistent placement across the whole set | Mixing stamp placement styles or adding stamps to the back flap |
If you’re designing custom envelopes, reserve a clear top-right margin so stamps don’t cover branding or required markings. For big batches like marketing mail or invitations, a quick stop at a USPS retail counter helps confirm machinability and the correct rate. It’s a simple way to apply how to put multiple stamps on an envelope while staying consistent with where to put a stamp on an envelope.
Conclusion
If you remember only a few steps, keep them simple and consistent. For where to put a stamp on an envelope, place it on the front in the upper-right corner. Center the recipient address on the front, and put the return address in the upper-left.
Clean spacing helps USPS equipment read your mail fast. Leave room around the stamp and addresses, and avoid marks, tape, or shiny ink near key areas. These basics cover most of how to mail a letter envelope without delays.
The two most common problems are stamp mistakes and postage mistakes. A stamp on the wrong side or too close to the edge can slow sorting. Underpaying postage is also common, especially with heavier letters, thick contents, or non-machinable pieces like square or oversized envelopes.
Before you drop it in a USPS collection box or a Post Office lobby slot, do a quick check. Confirm the envelope type, make sure the addresses are clear, and recheck postage. When in doubt about how to mail a letter envelope or where to put a stamp on an envelope, weigh it and verify the rate with USPS tools or at the counter to help prevent returns.

Leave a Reply