
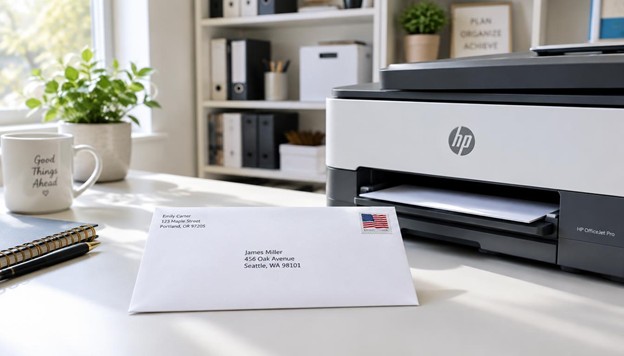
A compatible HP printer can print delivery and return addresses directly when document size, printer settings, and loading agree. Success depends on those matches, not one loading direction that works for every model.
In a home office, direct printing can give routine mail a neat, readable finish. You print onto the envelope itself, unlike an adhesive label that you print separately and attach. The goal is clear address alignment without wasting a stack of envelopes.
Key Takeaways
- Identify your exact printer model before choosing stock.
- Use an envelope size the model supports.
- Match the document to the physical envelope.
- Follow the loading diagram for your input tray.
- Inspect one proof before printing a batch.
Loading directions and available paper controls vary by model. An envelope setting cannot make an unsupported size usable. Start with one supported envelope and a test print.
How to Print on an Envelope with HP Printer: The Basic Workflow
A single envelope gives you the simplest check of the whole process before you commit to a batch. To learn how to print on an envelope with an hp printer, keep setup and proofing in this order. Leave the print command until the document and physical stock are ready.
- Confirm that your exact model supports the envelope size and stock.
- Create an envelope-sized document containing the delivery address and any return address.
- Load one envelope using the input tray diagram for your model.
- Match the envelope size and paper source in printer settings.
- Print one proof and inspect it before continuing with more envelopes.
The leading edge is the edge of the envelope that enters the printer first. Knowing that edge helps you read the loading diagram without guessing which way the text will face. Keep the diagram handy during your first attempt.
A return address is optional document content, not a separate printing operation. Printing immediately from an application skips checks that could prevent a wasted envelope. Choose suitable stock and check your printer’s supported media before building the layout.
Check Envelope Compatibility Before You Start
A smooth business envelope may feed cleanly where a clasped mailing envelope cannot, even when their dimensions match. Metal clasps can interfere with the paper path. Seams and multiple paper layers also affect feeding and print quality.
Find the printer model on its label or device information screen. Check that model’s supported envelope sizes, media restrictions, and input tray guidance. Those details tell you whether the envelope belongs in the printer at all.
| Envelope construction | Practical concern | Selection rule |
| Smooth plain paper | Seams create uneven thickness | Use a size and weight supported by the model |
| Windowed or self-sealing | Plastic and adhesive may react to heat | Use only stock explicitly suitable for the printer technology and model |
| Clasped or heavily embossed | Protrusions and raised surfaces can obstruct feeding | Avoid unless the model explicitly permits them |
Laser printing uses heat to fuse toner, so window material and adhesive need special care. Treat envelope paper type as a physical stock choice, not just a software setting. Unusual stock deserves a compatibility check even when its width and height appear suitable.
Check the printable area too, since supported stock does not promise printing across the entire surface. Leave room for addresses within the model’s margins. Once the envelope is suitable, set up its address layout in Word or another application.
Set Up an Envelope in Microsoft Word
In desktop Word, open Mailings > Envelopes to create a dedicated address layout. The Microsoft Word Mailings controls keep address entry separate from the page layout you use for ordinary letters. Desktop controls may differ by operating system, and Word for the web does not offer the same workflow.
Enter the Delivery and Return Addresses
Enter the delivery address in Word’s Envelopes dialog, then add or omit the return address. To print text onto an envelope, place the address text in an envelope-sized document rather than on a letter-sized page. That document gives the address positions a page boundary that matches your stock.
- Open Mailings > Envelopes in desktop Word.
- Enter the delivery address exactly as you want it printed.
- Enter the return address, or omit it if you do not need one.
- Check spelling and line breaks, including apartment or suite details.
Keep each address line readable without forcing text into a narrow block. Review any saved return address before accepting it, especially after a move. These checks matter when learning how to print on an envelope in word.
Match Envelope Size and Printing Options
Choose Options > Envelope Options and select the actual envelope size. If available, enter custom dimensions only when the printer supports them. Use the address formatting controls to adjust the font and address positions within the layout.
Open Printing Options to review Word’s feed-orientation controls against the model’s loading diagram. Do not trust Word’s feed illustration when it conflicts with the printer’s actual input tray instructions. The envelope printing options must describe the supported feed method, not a convenient-looking arrangement.
Choose Add to Document to inspect the envelope layout before opening the print dialog. Add to Document adds the layout to your file; it does not immediately send a print job. Check the envelope page for unwanted text or crowded lines.
Save the document so you can revise an address without rebuilding the layout. Desktop Word users can proceed to loading after that check. Without Word, use an alternative that preserves the required page dimensions.
Print an Envelope Without Microsoft Word
Word is optional, but control over your document’s dimensions is not. A browser-based editor or PDF tool can work if its output matches a supported envelope size. Judge the resulting page, not just how neatly the addresses appear on your screen.
How to Print an Envelope in Google Docs
For how to print an envelope in Google Docs, start in Pages mode and open File > Page setup. Check the available page sizes before placing your addresses. Google Docs does not provide an unrestricted custom-size entry among its standard page-size choices.
Confirm that the document’s actual dimensions match an envelope size your printer accepts. A landscape view alone does not establish the correct dimensions. Placing addresses on a letter-sized document is not a reliable substitute for an envelope-sized document.
If the required size is unavailable, use an envelope-capable editor or a tool that produces a correctly sized PDF. Do not shrink a letter page to imitate an envelope layout. That shortcut changes text size and address positions rather than creating the page you need.
Free Online Envelope Printing Tools
A browser-based address layout tool offers another route without desktop Word. Choose one that accepts your required dimensions and produces a printable preview. Check that free output includes the finished envelope page, not merely an on-screen draft.
To print envelopes online free, confirm that printing or downloading does not require a paid upgrade. Inspect the output for extra branding before using your own stock. Check the document’s page dimensions again after downloading it.
Consider address privacy before entering names and mailing details into an online service. For sensitive mailing lists, use local software that keeps your address work on your computer. Avoid uploading an entire contact list when you only need one envelope.
Disable browser headers and footers if the print interface offers them. These can add a web address, date, or page number to otherwise clean output. Use browser print preview to catch that unwanted text.
Those checks explain how to print on an envelope with an hp printer without Word while keeping dimensions intact. Keep the finished file ready for proofing. With a correctly sized document prepared, turn to physical envelope loading.
Load the Envelope in the Correct Direction
An address printed on the back often points to loading the wrong print side. Use the input tray diagram to establish envelope loading direction before sending the job. The surface receiving ink or toner is the print side.
- Find the envelope symbol or model-specific loading diagram for the input tray.
- Prepare a flat, undamaged envelope with its flap positioned as instructed.
- Load one envelope with the indicated print side and leading edge.
- Slide the paper width guides into light contact without bending the envelope.
- Confirm that the selected input tray contains the intended media.
A front input tray may feed differently from a rear input tray. Its location alone does not establish the correct face or flap direction. Follow the diagram for the actual paper path instead of copying another printer’s arrangement.
Use empty stock intended for printer feeding, not a sealed or stuffed envelope. Contents change the thickness and shape that the feed path must handle. Reject stock with curled corners or damage before it reaches the rollers.
The guides should hold the envelope steady without squeezing it into an arch. Recheck their contact after settling the envelope into place. Apply these checks to the DeskJet 2700 series or the appropriate LaserJet input tray next.
HP DeskJet 2700 and LaserJet Loading Differences
The HP DeskJet 2700 series uses a rear input tray, while LaserJet envelope sources depend on the exact model. Do not transfer one family’s loading arrangement to the other. Start with the device name rather than its inkjet or laser label alone.
How to Print on Envelopes with an HP DeskJet 2700
Load envelopes in the HP DeskJet 2700 series rear input tray with the print side facing up. Use the model’s diagram to establish the flap position and leading edge. Print side up does not settle those other two details.
Start with one envelope for your initial proof. Remove conflicting paper from the same feed position so the printer does not pick up the wrong sheet. Set the guides against the envelope rather than leaving them at the previous paper width.
Keep the envelope flat as you place it in the input tray. Avoid bending a corner while moving the guides. A straight starting position gives the printer a better chance of feeding the address layout squarely.
Record the flap position after your first successful proof. That note helps when you return to the same printer and stock later. Do not treat a remembered direction from another DeskJet series as a substitute for this model’s diagram.
How to Print on Envelopes with an HP LaserJet
Choose the envelope-compatible input tray listed for your exact HP LaserJet model. The supported source may be a multipurpose tray or a manual feed tray. Select that same source in printer settings so the job reaches the stock you loaded.
A search for “how to print on envelopes hp laserjet” still requires a model-specific answer. Tray 1 is not a universal envelope command across the family. Neither the tray number nor its location establishes one flap direction for every LaserJet.
A manual-feed prompt can mean the printer expects media in a different location. Read the prompt before loading another envelope into the same input tray. If the model presents a control-panel media confirmation, match it to the loaded stock.
After placing the envelope in the supported input tray, synchronize the software settings with that tray.
Match Paper Size, Media Type, and Paper Source
A correct address layout can still print badly if the driver treats the job as a letter-sized sheet. The driver is the software that passes printing instructions to your device. Match its controls to both the document and loaded envelope.
On Windows, open Printer Properties or Preferences from the application’s print dialog. On macOS, open the available paper and printer options in the print dialog. Labels vary by application, operating system, and driver.
| Setting | Match it to | Correct action |
| Paper size | Physical envelope and document | Select the same supported size |
| Media type | Envelope stock and model guidance | Choose Envelope if offered; otherwise use the instructed type |
| Paper source | Loaded input tray | Select that tray or its manual-feed option |
| Scaling | Prepared layout | Use Actual size or 100% for the proof |
An envelope media type may not appear in every driver. Choose plain paper only when the model’s instructions call for it, not as a universal fallback. Custom-size controls also depend on the available software and hardware support.
Select single-sided printing and check orientation in preview. Use actual size printing for the proof because automatic scaling can move or resize the address layout. Keep all text inside the printer’s minimum printable margins.
Send only one envelope first so any remaining mismatch is easy to identify.
Print One Test Envelope and Check Alignment
Your first envelope is a proof of both the address layout and physical feeding. Inspect the result before sending more jobs, even when print preview looks correct. A preview cannot show whether the envelope will enter straight or receive ink on the intended surface.
- The address appears on the intended side and reads upright.
- The delivery and return addresses occupy their intended locations.
- All address lines remain inside the printable area.
- The surface shows no smearing or physical damage.
A plain-paper mockup lets you compare address positioning against the physical envelope. Hold the layout beside the envelope to judge spacing and text placement. Follow that check with a real-envelope proof, since plain paper cannot confirm envelope feeding.
If the envelope test print fails, change one variable at a time. Do not rotate text as your first correction for an incorrectly loaded envelope. Check the physical orientation before changing the layout.
Note the successful input tray orientation so you can repeat it without guessing. Keep the approved proof near the printer while preparing more envelopes. After a successful proof, resolve any special-size or template needs before preparing additional envelopes.
Choose an Envelope Printing Template for Your HP Printer
A US A7 invitation envelope is not the same size as ISO A7 paper. Choose a layout using the envelope’s physical dimensions, not the A7 name alone. An HP envelope printing template must match your stock and the printer’s supported sizes.
| US envelope designation | Physical dimensions | Common use |
| Number 10 | 4 1/8 × 9 1/2 inches | Business correspondence |
| A7 | 5 1/4 × 7 1/4 inches | Invitations |
| A2 | 4 3/8 × 5 3/4 inches | Small cards |
A document with HP in its title does not prove compatibility. Open a free envelope printing template and inspect its actual page dimensions before entering addresses. Check that its address fields remain editable rather than forming part of a fixed image.
For how to print a7 envelopes on hp printer, use a matching preset or an accepted custom size. Enter 5 1/4 by 7 1/4 inches only if the model supports those dimensions. Not every printer accepts that envelope size.
If A7 is unsupported, choose another output method, such as adhesive labels or a compatible printing service. A template cannot change the printer’s physical feed limits. Once the template fits, add optional artwork without sacrificing address readability.
Add a Logo or Design Without Crowding the Address
A small business logo beside the return address can add identity without dominating the envelope. Insert the logo as an image in an editable envelope document. Keep its proportions when resizing so letters and shapes do not stretch.
For envelope logo printing, position the image near the return address without covering any text. Reserve clear areas for the delivery address and postage. Use readable contrast rather than a pale address over a busy background.
Proof small logo text as part of your return address design. Artwork that looks sharp on screen can reveal low resolution in print. Inspect the printed edges and fine lettering before using the design for more mail.
Keep custom envelope artwork inside the printer’s printable area. A full-bleed design, which reaches every edge, may require another printing method. Do not force artwork beyond the margins to imitate borderless output.
Printer capability does not establish mailability for a highly decorative design. Mailing requirements still apply to the finished envelope. If the proof is rotated, clipped, blank, or damaged, isolate the symptom before printing more.
Fix Envelope Printing Problems by Symptom
First establish whether the envelope fed through the printer. That separates envelope feed problems from errors in the address layout. An HP printer not printing envelopes needs a different check from one printing addresses on the wrong side.
Wrong Side, Rotation, or Clipped Addresses
Wrong-side output points first to print-side loading. Upside-down output points to leading-edge orientation or the application’s feed settings. Correct the responsible variable, then print another proof before moving the address text.
For clipped addresses, compare the document size with the physical envelope. Check scaling, address position, and printable margins next. Move text inward if the layout extends beyond the area the printer can reach.
An envelope paper mismatch prompt can reflect different job and input tray sizes. Compare the requested size with the tray’s configured size. Correct that disagreement rather than dismissing the prompt and hoping the layout fits.
No Feed, Jams, Smearing, or Blank Output
For no feed, check the selected input tray and any pending manual-feed prompt. Look for excessive guide pressure or bent stock that cannot enter squarely. Confirm where the printer expects the envelope before repeatedly sending the same job.
For a jam, cancel the job and follow the exact model’s clearing procedure. Do not pull forcefully against resistance. Avoid opening parts that the procedure does not identify for access.
Smearing can point to an unsuitable surface, incorrect media settings, or handling before ink dries. Check the stock and selected media type first. Allow the printed surface to dry before touching the address or stacking envelopes against it.
For a blank envelope, check the document preview and the printing surface. Run a plain-paper printer test to separate document trouble from a wider ink or toner issue. If that test is also blank, investigate the printer rather than the envelope layout.
A basic print interface may expose fewer media controls than model-specific printer software. More controls help only within the hardware’s supported range. Once you correct the underlying issue, return to a single proof instead of restarting the whole batch.
Conclusion
A reusable address layout lets you prepare the next envelope without rebuilding the document. Keep it paired with supported stock and matching document and printer settings. One successful proof print remains your checkpoint before a batch.
Save the working document and note the input tray orientation for that printer and envelope type. Keep those notes with the file so they remain easy to find. Print another proof whenever the envelope stock or size changes, even if the saved layout looks right.
Print one addressed envelope now, inspect both the text and surface, and save the successful setup for your next mailing.
FAQ
How do I print directly on an envelope?
Create an envelope-sized address document and print it onto supported empty stock, without using an adhesive label. Load the envelope in the direction shown for your exact model. Match the size and input tray in printer settings, then print one proof. Keep the envelope empty until printing and inspection are complete.
Why won’t my HP printer print envelopes?
Your HP printer may reject envelopes because of an unsupported size, wrong input tray, loading error, or paper-size mismatch. Read any display prompt before sending the job again. Check whether the requested size matches the loaded stock. If a plain-paper test also fails, investigate the wider printer problem rather than changing only the envelope document.
Can you set your printer to print on envelopes?
You can select an envelope size, supported media type, and paper source when your printer accepts that stock. Some drivers offer an Envelope media type, while others use different controls. Follow the model’s instructions for that choice. These settings describe the job; they cannot enable a size or construction the hardware cannot feed.
How do I print a logo on an envelope?
Insert the logo as an image in an editable envelope layout, keeping its original proportions. Place it inside the printable margins and away from the delivery address and postage. Use the best-quality original image you have rather than a small screenshot. Print a proof to check fine lettering and edges at the final size.
Can I print a design on an envelope?
You can print a design when your printer supports the envelope’s stock and size. Keep artwork within the printable area and leave addresses easy to read. Edge-to-edge designs may require a different printing method. A design that prints cleanly still needs to meet mailing requirements, so do not treat printer compatibility as postal approval.
How to set up Word to print on an envelope?
In desktop Word, open Mailings > Envelopes, enter the addresses, and choose the envelope size under Options. Check Printing Options against the printer’s loading diagram. Use Add to Document to inspect the layout before printing. If the file includes a letter page too, select the envelope page when sending your proof.
How to print envelopes on HP printer?
Match the document and printer settings to a supported envelope, then follow your exact HP model’s loading diagram. Input tray directions vary, so another printer’s successful arrangement may not work on yours. Start with one proof and inspect its side, orientation, and text placement. Save the working setup only after that physical check succeeds.
Can I download a free Word template for printing envelopes?
Free Word-compatible envelope layouts are available, but their page dimensions and editability still need checking. Choose one that matches your physical envelope and the printer’s supported sizes. Avoid a fixed image when you need to change addresses regularly. Desktop Word also includes an envelope layout tool, so a separate template download is optional.

Leave a Reply