
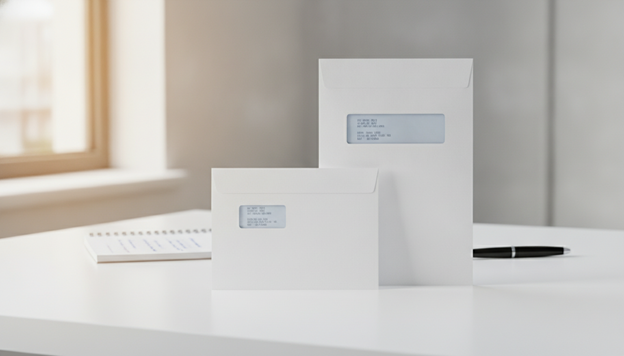
Choosing between #9 and #10 window envelopes might seem easy. But, a small mistake can delay your mail. This guide helps you pick the right size for your documents, ensuring they look professional.
Window envelopes have a clear section to show the address inside. They save time by eliminating the need for labels. They also work well for sending out lots of mail at once.
The main difference is in size. #9 envelopes are shorter than #10 envelopes. This affects what you can put inside and where the address should be. The position of the window also matters, so your layout might not work for both sizes.
Next, we’ll explore which size is best for different types of mail. You’ll learn about window alignment and how it impacts your printing. We’ll also discuss cost, automation, and how the USPS handles your mail. This will help you choose the right envelopes for your business.
Key Takeaways
- Window envelopes display the address through a clear poly film window, reducing labels and handling time.
- #9 window envelopes and #10 window envelopes differ in dimensions, which changes what folds and inserts fit best.
- Window placement affects how you set up print templates and where address lines must land.
- Common U.S. uses include invoices, statements, checks with remittance slips, and standard business letters.
- Smart selection balances envelope sizes, mailing speed, professional appearance, and USPS compatibility.
- Better alignment and fit can reduce reprints, returned mail, and wasted business mailing envelopes.
Overview of #9 and #10 window envelopes
In U.S. offices, window envelopes are a top choice for everyday mail. They show the address right through the paper. This makes messages look consistent and reduces steps in busy mailrooms.
When comparing #9 and #10 window envelopes, buyers look at two common sizes. Both are widely available and familiar to many mail teams.
#9 envelopes are smaller and often used for short notices. #10 envelopes are the standard for 8.5″ x 11″ letters. They fit well into many print-and-mail workflows.
Mail teams often compare both sizes for their goal of fast, repeatable sending. This includes daily statements, policy notices, and accounts receivable mail where timing is key.
| What you’re comparing | #9 window envelopes | #10 window envelopes |
| Best fit in day-to-day business mail | Shorter messages, compact folds, and smaller inserts | Standard business letters and common transactional forms |
| Workflow match in mailing operations | Works well when documents are designed for tighter folding patterns | Often aligns with high-volume templates, printers, and inserters used for routine runs |
| Where it shows up most | Notices, smaller statements, and selective accounts receivable mail formats | Billing letters, statements, and general correspondence sent at scale |
| What to confirm before ordering | Window size and offsets, plus how address lines land after folding | Window placement variations across product lines and template settings |
Window placement helps with automation. A well-set template lets the address print on the page, not on a label. This reduces rework and mis-mailing risk, saving time in high-volume mail.
Not every window is in the same spot, even in the same size. Before buying, check the window dimensions and offsets. This ensures #9 and #10 envelopes work smoothly in real-world mail operations.
#9 window envelopes size and specifications
#9 window envelopes are a top pick for professional mail in U.S. offices. They are perfect for short notices and keeping addresses visible without labels. This makes them ideal for billing inserts.
Standard dimensions and what folds fit inside
The #9 envelope is 3 7/8 in x 8 7/8 in. This size is great for short inserts or folded pages. It’s perfect for brief updates and forms.
A letter-sized page can fit, but it might need extra folds. This can make the page look busy. Always test a sample before a big print run.
Typical window size and window position
Most #9 envelopes have a single window. But sizes and positions vary. Make sure to align the window with your address block for accuracy.
Small errors in the window can hide important details. Always check the envelope spec sheet against your proof.
| Spec detail | Common range seen in listings | Why it matters for daily mailing |
| Envelope size | 3 7/8 in x 8 7/8 in (standard) | Sets the fold pattern and helps sort window envelopes sizes by insert type |
| Window style | Single-window is most common | Keeps addressing simple for invoices, notices, and statement envelopes |
| Window cut size | Varies by manufacturer and product line | Impacts how many address lines can show without clipping |
| Window offset reference | Measured from left edge and bottom edge | Drives template setup and prevents misalignment in a commercial #9 envelope |
| Insert strategy | Short inserts or multi-folded 8.5″ x 11″ pages | Helps avoid bulky folds and keeps the mailpiece neat |
Common paper weights, finishes, and color options
White wove stock is the usual choice for #9 envelopes. Some vendors offer security tint patterns for privacy. Check the paper weight and security features in the specs.
White keeps the classic billing look. Colored options are available but might look like marketing mail. Order samples to check print contrast and window clarity.
#10 window envelopes size and specifications
In many U.S. offices, #10 window envelopes are the default for everyday correspondence. They make it easy to see the address and keep mail looking consistent. This format is familiar to recipients and easy to stock in volume for routine letter-size mailing.
Standard dimensions and what documents fit without extra folding
Commercial #10 measures 4 1/8 in x 9 1/2 in. It’s designed for 8.5 x 11 sheets folded into a clean tri-fold. This keeps pages tidy and reduces bulky creases. Many teams choose #10 business envelopes for letters, invoices, and notices that need a neat presentation.
| Item | Common spec for #10 | Practical impact in daily mail |
| Envelope size | 4 1/8 in x 9 1/2 in | Fits standard tri-folds without feeling tight during insertion |
| Typical insert | 8.5 x 11 sheet, tri-fold | Works well for letterhead, statements, and one-page notices |
| Insertion feel | Standard opening for automated stuffing | Helps reduce corner bends and slows fewer machines |
Standard window types and placement variations
Window envelopes in this size are widely sold as single-window or double-window styles. A single window is common for simple letters. A double window can show both the recipient address and a return address block without extra printing.
Window placement can vary by manufacturer, even when the envelope is labeled the same. Regular and extended window options change what part of the page shows. It’s important to confirm the window size and the offsets before ordering. This avoids shifts that can hide a ZIP Code or clip the first line of the address.
Compatibility with business forms and printed letterhead
Because the tri-fold is predictable, #10 business envelopes pair well with business forms and printed letterhead. Many organizations print the letterhead and address on the same sheet. Then, they fold and insert so the address lands cleanly in the window. This supports faster processing while keeping the front of the mailpiece free of labels.
For consistent results, keep the address block in a standard location across templates. Test a short run before a large letter-size mailing. With #10 window envelopes, that small check can prevent reprints and reduce returned mail caused by misalignment.
window envelopes: how to choose the right size for your mailing
Choosing the right window envelopes is easier when you follow a simple process. You want to pick a size that fits your document, folding method, and equipment. This way, you avoid extra steps.
First, consider your paper size. In the U.S., most office documents are 8.5″ x 11″. This detail affects how many folds you need and where the address will go.
Matching document size to envelope size
- Step 1: Check your document size and where the address will print. If the address moves between templates, aligning it in the window gets harder.
- Step 2: Choose a fold style. Tri-folds are common for invoices and letters. Half-folds improve readability but change where the address goes.
- Step 3: Decide between #10 and #9 window envelopes based on your fold plan. #10 envelopes usually work better for standard tri-folds.
If you work with shorter pages or tighter folds, #9 envelopes might be better. They also fit well for statement designs if the address is placed carefully.
Choosing based on insert thickness and enclosure count
Thickness matters more than just fit. It affects how well envelopes work in machines, especially when inserts vary.
- For a single sheet, either size works well if folds are consistent and the address block is stable.
- For multiple pages and a remittance slip, #10 envelopes often fit better than #9.
- If you see wrinkles or uneven sealing, reduce the number of inserts or improve folding before speeding up machines.
Balancing professionalism, readability, and cost
#10 envelopes are seen as standard corporate mail in the U.S. They also unfold more cleanly, making messages feel formal and easy to scan.
#9 envelopes can save paper but may need extra folding. This can increase handling time and errors as volumes grow.
| Decision point | #9 window envelopes | #10 window envelopes |
| Best fit for | Shorter formats, compact statement-style pieces, tighter folds | Standard 8.5″ x 11″ letters and invoices with a tri-fold |
| Insert tolerance | Less room for thick packs; more sensitive to uneven stacks | More breathing room for multi-page sets and return envelopes |
| Workflow impact | May add folds and handling steps if templates are not designed for it | Often simpler to fold, insert, and seal at speed |
| Mailing cost control | Can reduce materials, but mistakes can erase savings in reprints and rework | May cost more per unit, yet can lower waste through smoother processing |
For mailing cost control, compare the whole process: printing, folding, inserting, and redoing failed pieces. Choosing envelope size based on total workflow performance is usually better than just looking at envelope prices.
Address visibility, window alignment, and printing considerations
Getting clear addresses is all about planning, not luck. With window envelopes, the goal is simple: the text must sit cleanly in the cutout after the paper is folded and inserted.
How to ensure the address lines land in the window correctly
Good address placement depends on three things working together: the document layout, the fold, and the printer’s margins. If one shifts, the address can ride too high, too low, or off to one side.
Before a full run, print one page, fold it the same way every time, and insert it. Adjust line breaks and top spacing until the street, city, state, and ZIP are easy to read through the window.
Most alignment problems come from printer scaling like “Fit to page,” uneven folds, or picking a template with the wrong window offset. Small changes add up fast when you’re stuffing a batch.
Differences between single-window and double-window layouts
A single-window layout shows the recipient address only. It’s common for statements and letters where the return address is printed on the envelope or placed elsewhere.
A double-window layout shows both recipient and return addresses from the same sheet. This can cut steps because you don’t need pre-printed stock, but window alignment is tighter since two blocks must land correctly at once.
When you switch between layouts, recheck fold style and address block position. The same document can shift if the return address moves to a different corner or uses a larger font.
Printer and template tips for clean window alignment
Use vendor-provided files when possible, and confirm the match to the exact product. Many “generic” files don’t account for subtle differences in cutout location, which matters for #10 window envelopes templates and for repeat mailings.
For #9 window envelopes printing, keep print settings consistent: disable auto-scaling, confirm orientation, and use the same paper tray each time. A small change in feed path can move the address block by a few millimeters.
| Checkpoint | What to confirm | What it prevents |
| Print scaling | Set to 100% and turn off “Fit to page” | Text shrinking and drifting away from the window cutout |
| Fold control | Use the same fold style and crease location for every insert | Inconsistent address placement from piece to piece |
| Template match | Verify window offset matches the envelope model, not just the size | Misplaced address lines even when the layout looks correct on screen |
| Supplier consistency | Standardize envelope specs for recurring jobs | Unexpected shifts caused by minor manufacturing variations |
When your layout, fold, and settings stay stable, window envelopes look sharp and process smoothly. That consistency makes window alignment easier to maintain across printers, paper stocks, and mailing cycles.
Mailing, postage, and USPS processing compatibility
When you send window envelopes, aim for a neat, uniform piece that moves quickly. A clean fold, tight seal, and consistent build help avoid jams. This setup is key for smooth processing in high-volume mail.
For USPS machinable mail, the window’s condition is crucial. Ensure the plastic film is flat, fully attached, and wrinkle-free. A bumpy window can blur the address, slowing down automated sorting.
Address clarity is vital for USPS machinable mail. Use dark text on light paper for clear lines through the window. Avoid patterns near the address to support automation and reduce manual handling.
Inserts can shift during transport, especially in mixed stacks. Fold and insert consistently to keep the address centered. Small changes in paper or inserts can hide ZIP Codes, affecting delivery.
Postage depends on the final piece, not just envelope size. Check USPS requirements and pricing for your exact piece before printing. A mail service provider can confirm if your envelopes qualify as USPS machinable mail.
| Compatibility check | What to look for | Why it matters in USPS processing |
| Seal and flap | Even adhesion, no lifting corners, fully closed edges | Helps the piece stay intact through high-speed equipment and supports automation compatibility |
| Window film condition | Flat plastic, no creases, no cloudy spots, clean cut edges | Improves readability for USPS machinable mail and reduces scan errors |
| Address legibility | Dark ink, clear font, adequate spacing, no graphics behind address | Supports automated address recognition and steadier throughput |
| Insert stability | Consistent folds, same insertion depth, snug fit inside window envelopes | Keeps the delivery address in view during handling and sorting |
| Final piece specs | Confirm weight, thickness, and class before mailing | Prevents surprises with postage considerations and avoids pieces being reclassified |
Common use cases for #9 window envelopes vs #10 window envelopes
Choosing between #9 and #10 window envelopes depends on how you handle documents. The right choice makes the address easy to read, makes inserting documents quicker, and cuts down on mistakes.
Invoices, statements, checks, and remittance applications
Teams dealing with accounts receivable often use window envelopes for invoices. This way, the bill-to address is printed right on the invoice or statement. It saves steps and keeps records consistent.
#10 window envelopes are great for packs with more pages, a remittance slip, or a return stub. They also prevent edge curl and keep inserts flat during mailing.
#9 window envelopes are good for smaller statement layouts. They’re also a steady choice for mailing the same short form every time.
Business letters, notices, and direct mail
In the U.S., #10 window envelopes are common for business letters on letter-size paper. They’re used for notices, reminders, and formal letters where a neat tri-fold is important.
Promotional direct mail might use other formats, but #10 envelopes are used for official messages. This is key when credibility and quick recognition are important.
When either size can work and what to prioritize
When both sizes work, start with how well they align, then how fast you can insert them. Consider how the page unfolds and the total cost of the workflow.
Standardizing across departments can reduce costs and simplify ordering. It’s helpful when you need one spec for business letters and another for high-volume mailing, without custom setups for every job.
| Mailing need | #9 window envelopes | #10 window envelopes |
| Document style | Works best with shorter forms and consistent folds | Fits common tri-fold letters and multi-page packs |
| Address window tolerance | Tighter layout can demand more precise template control | Often offers more forgiving placement for standard letter designs |
| Best-fit finance use | Compact statements and predictable cycles | window envelopes for invoices with remittance slips or extra pages |
| Reader experience | Smaller format can feel streamlined for quick review | Opens like a standard letter and supports longer explanations |
| Operational focus | Consistency in forms and fold settings | Speed on high-volume inserting and fewer jams with thicker sets |
Conclusion
Choosing between #9 and #10 window envelopes depends on your daily needs. #9 is smaller, perfect for tight layouts. On the other hand, #10 is the standard for U.S. business letters, offering more room.
To pick the right size, think about what you send most often. Check your document size and how it folds. Also, look at the window’s size and position on the envelope.
Before buying in bulk, test a few envelopes. Print, fold, and insert them to check alignment. This step helps avoid mistakes and keeps your brand looking good.
The best envelope size makes sure the address is clear and easy to read. It should also work well with your printer or inserter. Whether you need #9 for small inserts or #10 for regular letters, choose wisely.

Leave a Reply